Apply bitmap effects
You can choose bitmap effects by using the Effects menus and the FX tab in the Properties docker. To browse the effects that are available in the application, see Special effects categories.
Before you apply an effect, you can customize it. All dialog boxes of bitmap effects have a preview window that allows you to preview your designs in real-time as you adjust the effect settings. You can pan to a new area, zoom in or out, and choose how to display the artwork in the preview window, so you can evaluate the adjustments you make. By default, the application also shows a live preview of the image in the drawing window as you modify the effect settings.

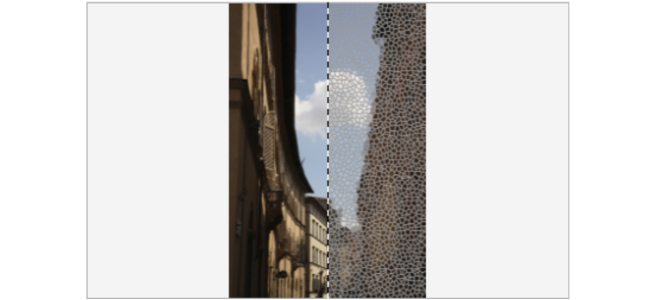
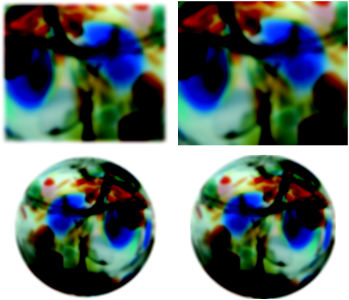
The before and after full (top) and split (bottom) previews are particularly useful to keep track of edits and understand how different settings affect the image.
You can apply a bitmap effect to one or more objects, a group of objects, or an image area.
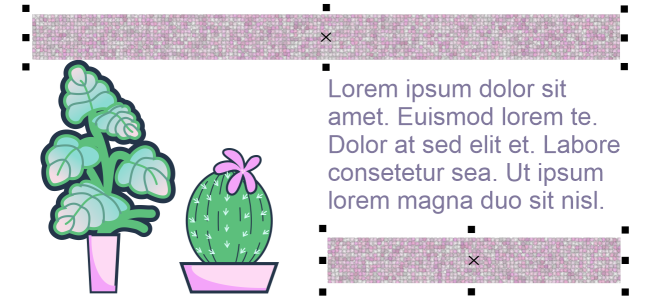
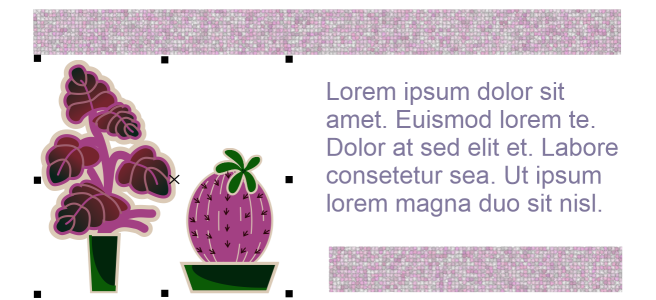
A bitmap effect is applied to two selected objects (top) and to a group of objects (bottom).
To apply a bitmap effect to an image area, choose a drawing tool, draw a closed shape to select the area you want, convert the shape to a lens, and then apply an effect to the lens. For more information about using lenses, see Lenses.
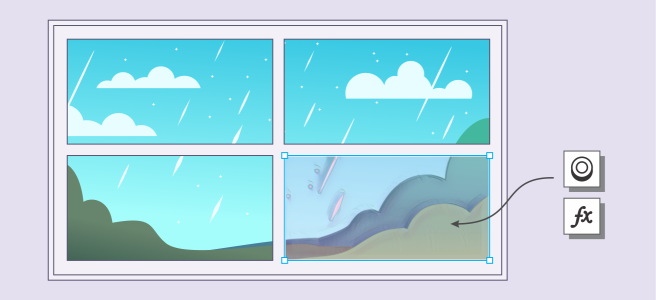
A bitmap effect is applied to an image area. The lens defines the boundaries of the image area to which the effect is applied and protects the area from the effect.
Once you apply a bitmap effect, it appears in the Properties docker. The FX tab in the Properties docker is the hub for non-destructive editing, allowing for quick adjustments and unlimited experimentation. You can show and hide special effects, edit applied effects, and apply multiple special effects to the same object. Plus, you can change the order of the applied special effects, and you can delete a special effect. Effects are cumulative; each time you apply an effect, it's stacked on top of the previous effect. On the FX tab, the effects appear in the order in which you apply them, with the most recently added effect at the top of the list. You can also flatten effects to apply changes permanently.
When you apply a bitmap effect to a bitmap object, CorelDRAW automatically adds a border around the bitmap so that the effect covers the entire image. Disabling the automatic inflate option cuts off the effect at the edges of the image. For example, if you apply the Gaussian Blur effect to a rectangle, the corners are cut off.
Gaussian Blur with Auto Inflate (left); Gaussian Blur without Auto Inflate (right)
If you want to use a custom border size, disable automatic inflation, and manually specify the dimensions of the inflated bitmap.
CorelDRAW lets you track, record, and automate special-effects operations. For more information, see Use macros and scripts to automate tasks.
Adding plug-in filters to CorelDRAW provides additional features and effects that you can use to edit images. You can add plug-in filters, and you can remove them when you no longer need them.
To apply a bitmap effect to an object
Some effects support only RGB images. If an image is in a color mode that is not supported, the application converts the image to the RGB (24-bit) mode.
To browse the bitmap effects that are available in the application, see Special effects categories.
By default, as you modify the effect settings, the application shows a representation of the adjusted image in the drawing window. To disable the live preview, disable the Preview check box.
You can copy effects applied to an object. For more information, see To copy effects from one object to another.
You can change the visibility of the effects applied to an object. For more information, see To work with bitmap effects.
You can also apply an effect to a selected object by doing one of the following:
To apply a bitmap effect to an image area
You can adjust the shape of a lens by using any of the Edit Shape and Curve tools. For more information about shaping objects, see Shape objects.
Feather the edges of a lens to make it blend seamlessly into your composition. For more information about feathering, see Feather object edges.
You can apply multiple effects to a lens. Click the Add effect button ![]() on the FX tab of the Properties docker, and choose an effect from the menu. Repeat this step for each effect that you want to add. On the FX tab, the effects appear in the order in which you apply them, with the most recently added effect at the top of the list.
on the FX tab of the Properties docker, and choose an effect from the menu. Repeat this step for each effect that you want to add. On the FX tab, the effects appear in the order in which you apply them, with the most recently added effect at the top of the list.
By default, each new object that you create with a drawing, rectangle, or ellipse tool has a black outline. You can remove the outline if you don't need it. For more information, see To remove the outline of an object.
When you convert a vector object to a lens, a lens icon ![]() appears in the Objects docker to the right of the object.
appears in the Objects docker to the right of the object.
To work with bitmap effects
Clicking the Show/Hide icon ![]() on the FX tab of the Properties docker changes the visibility of individual effects, whereas clicking the Show/Hide Effects icon
on the FX tab of the Properties docker changes the visibility of individual effects, whereas clicking the Show/Hide Effects icon ![]() in the Objects docker changes the visibility of all effects applied to an object and overrides the visibility settings for individual effects that you may have set on the FX tab of the Properties docker.
in the Objects docker changes the visibility of all effects applied to an object and overrides the visibility settings for individual effects that you may have set on the FX tab of the Properties docker.
You can also hide and show effects by clicking the Show/Hide Effects toggle icon ![]() in the Objects docker (Window
in the Objects docker (Window ![]() Dockers
Dockers ![]() Objects). To hide or show the effects of multiple objects, select the objects, and click the Show/Hide Effects toggle icon
Objects). To hide or show the effects of multiple objects, select the objects, and click the Show/Hide Effects toggle icon ![]() .
.
To flatten effects
To inflate a bitmap manually
To automatically inflate the bitmap to cover the entire image, click Bitmaps ![]() Inflate Bitmap
Inflate Bitmap ![]() Auto Inflate Bitmap.
Auto Inflate Bitmap.
To choose default bitmap inflation settings
To add a plug-in filter
To remove a plug-in filter, click a plug-in folder from the Plug-in folders list, and click Remove.