Quick links to procedures on this page:
The Project Timer feature lets you track the time spent on a project with ease. To fine-tune the tracking records, you can add tasks and track the time spent on each task. You can give a task a meaningful name, and you can edit a task log by resetting the counter or specifying the task duration and start and finish date.
Tracking information is saved with the document and is easily accessible. In addition, you can save the tracking records as Comma-Separated Values (CSV) or text (TXT) files that can be opened and formatted in a spreadsheet application to create time sheet reports.
Additional settings are available to help you customize Project Timer to match your workflow. You can set automation preferences, specify whether and how to track inactivity, and simplify the Project Timer toolbar even more by hiding UI elements.
The Project Timer toolbar appears below the standard toolbar.
The arrow on the Project Timer toolbar lets you show and hide the Project Timer panel, where you can add and edit tasks and access various settings.
| 2 . |
Click the Track/Pause/Off button  on the Project Timer toolbar. on the Project Timer toolbar. |
|
If the Project Timer toolbar is not displayed, click Windows  Toolbars Project Timer. Toolbars Project Timer. |
|
The Track/Pause/Off button on the toolbar shows you if a task is being tracked. This button has the following states: |
|
• |
 — shows that tracking for the active task has been suspended temporarily, and Project Timer is not recording the time at present. Depending on Project Timer settings, this may happen when the Project Timer panel is open, or another document is in focus. For more information about settings, see To adjust Project Timer settings. — shows that tracking for the active task has been suspended temporarily, and Project Timer is not recording the time at present. Depending on Project Timer settings, this may happen when the Project Timer panel is open, or another document is in focus. For more information about settings, see To adjust Project Timer settings. |
| • |
Click the drop-down arrow on the Project Timer toolbar, and in the Project Timer panel, perform any of the tasks from the following table. When you are finished, click outside the Project Timer panel to hide it. |
|
|
|
|
|
|
|
|
|
|
|
|
|
|
|
|
|
Click the Recorded time field twice, and specify the amount of time you want.
|
|
|
Click twice the Dates field of the task, and specify the start and finish time and dates you want.
|
|
|
|
You can reset the timer for the active task. You can also change the task start or finish time and date, or you can change the task duration.
| 2 . |
Click Edit, and perform a task from the following table. |
|
|
|
|
|
|
|
|
Click Edit task, and do any of the following:

|
Type values in the Recorded time boxes to specify the total time spent on the task. The first box shows hours, the second one — minutes, and the third one — seconds. |
|
You can save the tracking information as a CSV or TXT file, and you can then open and format the file in Microsoft Excel or other spreadsheet applications.
| 2 . |
Click the Export options button  , and click one of the following commands: , and click one of the following commands: |
|
• |
Export to CSV — to save the time sheet as a CSV file. CSV files preserve the information in a table-structured format similar to spreadsheets. Unlike spreadsheets, they can contain only one sheet and do not support formatting options and formulas. The CSV files exported from Project Timer use commas as field separators. |
| 3 . |
In the Save As dialog box, locate the folder where you want to save the file, and type a filename. |
With the help of the Project Timer Settings dialog box, you can set Project Timer to start or pause tracking automatically in response to specific actions or changes. In addition, inactivity settings help you decide how to treat periods of time when the project is open but there are no recorded document changes. For example, you can set Project Timer to display a prompt or pause tracking after a specified time of inactivity. You can also customize the Project Timer toolbar by displaying and hiding controls.
| 2 . |
Click the Project Timer options button  , and click Settings. The Project Timer Settings dialog box appears. , and click Settings. The Project Timer Settings dialog box appears. |
| 3 . |
In the Project Timer Settings dialog box, perform a task from the following table. |
|
|
|
|
|
In the Automation area, enable any of the following check boxes below Start recording when:
|
|
|
In the Inactivity detection area, choose one of the following options from the On inactivity list box:
|
|
Prompt — to display a prompt after a specified time of inactivity |
|
|
Pause timer — to pause recording after the specified time of inactivity and resume tracking when you continue working on the document |
|
|
Always track — to ignore inactivity and record all time as work |
|
|
|
In the Inactivity tolerance box, type a value.
|
|
|
|
|
|
|
|
Task name — to show or hide the name of the task that is being tracked |
|
|
Timer — to show or hide the timer displaying the current task duration |
|
If no changes are made to the document for some time, by default Project Timer prompts you to decide how to track this time of inactivity. The prompt is displayed as soon as the inactivity tolerance time elapses.
| • |
In the Inactivity Detected dialog box, click one of the following buttons: |
|
• |
Discard — to delete the entire period of inactivity from the tracking record |
|
• |
Track as work — to record the period of inactivity as work time. This option is useful to track time spent on tasks related to the project but not performed in CorelDRAW. For example, you may have done research on the project or discussed it at length with a client over the phone. Hence, you want to track this time even though you did not make any changes to the project itself. |
|
• |
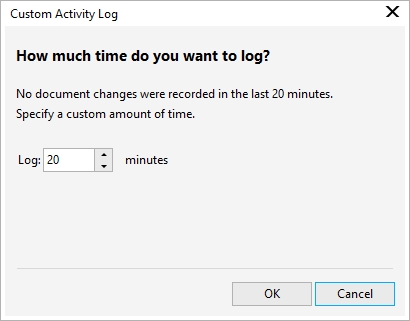
Custom — to log a custom amount of time. In the Custom Activity Log dialog box, specify the amount of time (in minutes) that you want to be tracked as work. For example, you may have been away from your desk for an hour. If you worked for 20 minutes during that hour on project-related tasks, you can choose to log only 20 minutes. The remaining 40 minutes will be discarded. |
The Custom Activity Log dialog box

Not all suite components documented in this Help are available in our Trial, Academic, and OEM versions. Unavailable components may include Corel applications, product features, third-party utilities, and extra content files.
Copyright 2018 Corel Corporation. All rights reserved.