Quick links to procedures on this page:
• |
• |
• |
• |
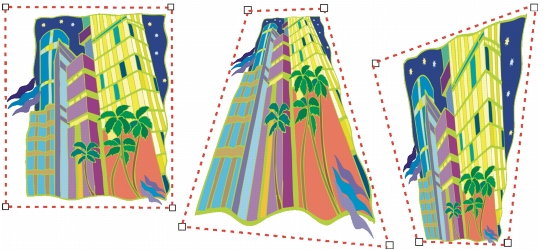
You can create a perspective effect by shortening one or two sides of an object. This effect gives an object the appearance of receding in one or two directions, thereby creating a one-point perspective or a two-point perspective.
Perspective effects can be added to objects or grouped objects. You can also add a perspective effect to linked groups, such as contours, blends, and extrusions. You can’t add perspective effects to paragraph text, bitmaps, or symbols.
The original graphic (left) with one-point (middle) and two-point (right) perspectives applied to it.
After you apply a perspective effect, you can copy it to other objects in a drawing, adjust it, or remove it from the object.
| To apply a perspective |
Pressing Ctrl constrains the node’s movement to the horizontal or vertical axis
to create a one-point perspective effect.
|
You can move opposing nodes the same distance in opposite directions by
pressing Ctrl + Shift as you drag.
|
| To copy an object’s perspective effect |
1. |
Select an object to which you want to apply a perspective effect.
|
2. |
Click Effects |
3. |
Select an object whose perspective effect you want to copy.
|
You can also use the Attributes eyedropper tool
|
| To adjust the perspective |
1. |
In the toolbox, click the Shape tool
|
2. |
Select an object that has a perspective effect.
|
3. |
Drag a node to a new position.
|
You can also adjust the perspective by dragging one or both of the vanishing
points.
|
| To remove a perspective effect from an object |
1. |
Select an object that has a perspective effect.
|
2. |
Click Effects |
|
|
Copyright 2012 Corel Corporation. All rights reserved.