Quick links to procedures on this page:
• |
• |
• |
• |
| Premium feature |
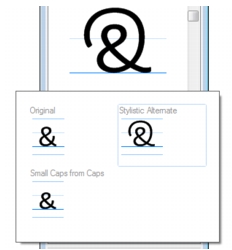
The revamped Insert character docker makes it easy to find and insert special characters, symbols, and glyphs (variations of individual characters or character combinations) of OpenType fonts.
All characters, symbols, and glyphs included in a font are displayed by default, but you can filter character subsets to display only the characters you want. For example, you can display only currency symbols or numbers, or you can display only Cyrillic characters and symbols.
Characters included in a font are organized in the following categories:
• |
Common — includes arrows, currency, mathematical symbols, numbers,
punctuation marks, and separators as well as CJK symbols and punctuation marks
(used in Asian scripts)
|
• |
Scripts — includes the scripts that the selected font supports, such as Latin,
Greek, Cyrillic, Hiragana and Katakana, Han, Arabic, or Hebrew scripts
|
• |
OpenType — includes the OpenType features provided by the selected font such as
standard ligatures, discretionary ligatures, fraction, alternate annotation forms, and
more. For more information about OpenType features, see Working with OpenType
features.
|
The Insert character docker is ideal for viewing and applying the OpenType features provided by OpenType fonts. The default view shows a list of characters in which the glyphs for individual characters appear grouped. Alternatively, you can display a longer list that shows available glyphs at a glance.
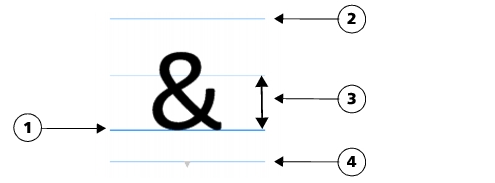
Each selected character appears against a set of blue lines that let you preview its position in relation to the text baseline.
You can use the list of most recently used special characters to copy characters that you use often. The list retains the font attributes of most recently used characters and any OpenType features that were applied. You can manage the list by removing characters that you no longer need.
| To add a special character, symbol, or glyph |
1. |
Using the Text tool
|
2. |
Click Text |
3. |
In the Insert character docker, choose a font from the Font list box.
|
4. |
Double-click a character in the Character and glyph list.
|
If you cannot find the character you want, open the Character filter list box, and enable the Entire font check box. |
| To filter special characters, symbols, and glyphs |
1. |
Click Text |
2. |
In the Insert character docker, choose a font from the Font list box.
|
3. |
Open the Character filter list box, and enable the check boxes for the character
subsets that you want to display.
|
4. |
Click Close.
|
| To view glyphs of OpenType features |
1. |
Click Text |
2. |
In the Insert character docker, choose an OpenType font from the Font list box.
|
3. |
Open the Character filter list box, and in the OpenType area, enable any of the
check boxes for the available OpenType features.
|
4. |
Do one of the following:
|
• |
To display a list that includes grouped glyphs, make sure that the Show all
glyphs button
|
• |
To display a list that includes all available glyphs, click the Show all glyphs
button
|

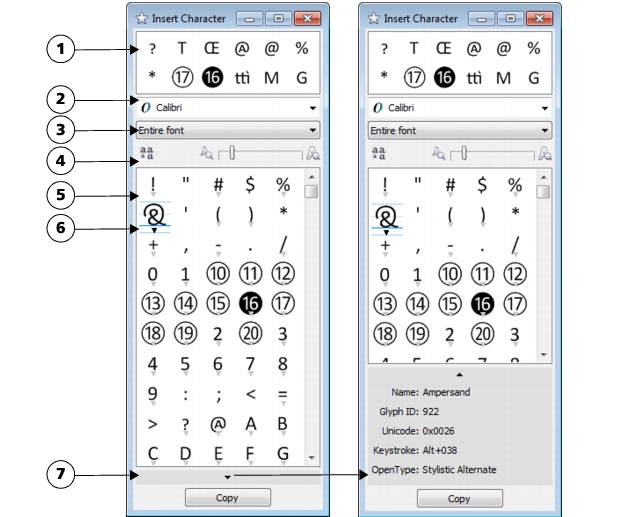
Left: The OpenType feature indicators below individual characters show that more glyphs are available. Right: When the Show all glyphs button (1) is pressed, you can see available glyphs at a glance.
Viewing grouped glyphs
The Show all glyphs button is not available for fonts that do not support
OpenType features.
|
Some glyphs provided by OpenType features vary depending on the context in
which they appear and cannot be shown in the Insert character docker. You
can view and insert such glyphs in the document window by using the
Interactive OpenType option. For more information, see To enable the
onscreen OpenType feature indicator.
|
| To use the list of most recently used special characters |
1. |
Click Text |
2. |
In the list of most recently used special characters, perform a task from the
following table.
|
|
|
Copyright 2012 Corel Corporation. All rights reserved.