Quick links to procedures on this page:
• |
• |
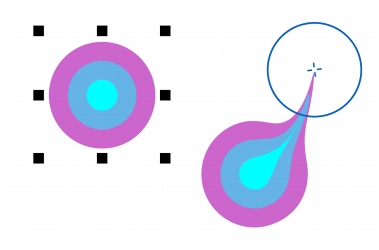
Smudging and smearing let you shape an object by pulling extensions or making indents along its outline. With smudging, the extensions and indents resemble streaks that vary little in width as you drag with the Smudge brush tool. With smearing, the extensions and indents have a more fluid shape that decreases in width as you drag with the Smear tool.
When applying smudging to an object, you can control the extent and shape of the distortion whether you activate the controls for the graphics tablet stylus or use the settings that apply to a mouse.
The smudging effect responds to both the angle of rotation — or bearing — and the tilt angle of a graphics tablet stylus. Rotating the stylus changes the angle of the smudging effect and tilting the stylus flattens the brush tip and changes the shape of the smudging. If you are using a mouse, you can simulate the bearing and tilt of the stylus by specifying values. Increasing the bearing angle from 0 - 359° changes the angle of the brushstroke. As you decrease the tilt angle from 90° - 15°, you change the smudging shape by flattening the brush tip.
Smudging can respond to the pressure of a stylus on a tablet where the smudging widens with more pressure and narrows with less. If you are using a mouse or want to override stylus pressure, you can enter real values to simulate the pressure of a stylus on a graphics tablet. Negative values to -10 create a narrowing distortion, 0 maintains an even stroke width, and positive values to 10 create an expanding distortion.
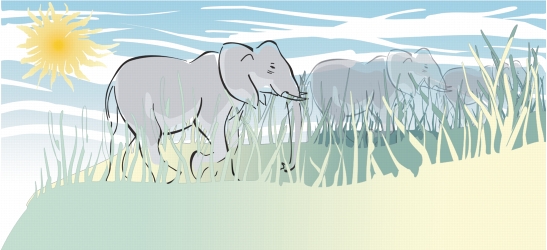
The sun’s rays and blades of grass have been created by dragging outwards with the Smudge brush tool and the clouds by dragging inwards.
Whether you are using a stylus or a mouse, you can specify the nib size. The nib size determines the width of the smudging applied to an object.
To control the smearing effect, you can set the size of the brush nib and the amount of effect to apply, and you can use the pressure of your digital pen. You can use smooth curves or curves with sharp corners when smearing objects.
Smearing an object
| To smudge an object |
1. |
Select an object using the Pick tool
|
2. |
In the toolbox, click the Smudge brush tool
|
3. |
Do one of the following:
|
• |
To smudge the inside of an object, click outside an object, and drag inwards.
|
• |
To smudge the outside of an object, click inside an object, and drag outwards.
|
You cannot apply smudging to Internet or embedded objects, linked images,
grids, masks, mesh-filled objects, or objects with blend and contour effects.
|
To get the minimum and maximum values for the smudging controls, right-
click the control on the property bar, and click Settings.
|
| To smear an object |
1. |
Select an object by using the Pick tool
|
2. |
In the toolbox, click the Smear tool
|
3. |
Do one of the following:
|
• |
To smear the outside of an object, click outside an object, close to its edge, and
drag outwards.
|
• |
To smear the inside of an object, click inside an object, close to its edge, and drag
inwards.
|
The difference between a smooth smear and pointy smear is noticeable only
with higher Pressure values.
|
|
|
Copyright 2012 Corel Corporation. All rights reserved.