Quick links to procedures on this page:


Aligning and distributing objects

Corel DESIGNER lets you precisely align and distribute objects in a drawing. You can instantly view the effect of changes as you modify the options in the Align and distribute docker. By default, objects are aligned and distributed based on their paths. You can also align and distribute objects from the edge of their outlines.

You can align objects to each other or to parts of the drawing page such as the center, edges, and grid. When you align objects to objects, you can line them up by their centers or by their edges. You can also align objects with a reference point by specifying its exact x and y coordinates.

Corel DESIGNER lets you align multiple objects to the center of the drawing page horizontally or vertically.

You can distribute objects at equal intervals in a specified area.

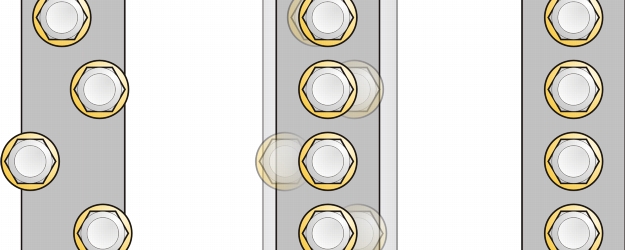
Example of aligning objects to each one’s center

To align objects Back to Top
1.
 
Select the objects.
2.
 
Click Arrange Align and distribute Align and distribute.
3.
 
In the Align area of the docker, click one of the following buttons to use an object edge or center for aligning.
Align left — to align the left edges of objects
Align center horizontally — to align object centers along a vertical axis
Align right — to align the right edges of objects
Align top — to align the top edges of objects
Align center vertically — to align object centers along a horizontal axis
Align bottom — to align the bottom edges of objects
To align objects from their outlines, click the Outline button .
4.
 
In the Align objects to area, perform any of the following tasks.

To
Do the following
Align an object with a specific object
Click the Active objects button .
If you select the objects one at a time, the last object selected is the reference point for aligning the other objects. If you marquee select the objects, the object that is positioned in the upper-left corner of the selection is used as a reference point.
Align an object with the page edge
Click the Page edge button .
Align an object with the page center
Click the Page center button .
To align the center of the object with the page center, make sure that the Align center horizontally button and Align center vertically button in the Align area are enabled.
Align an object with the closest grid line
Click the Grid button .
Align an object with a specified point
Click the Specified point button , and type values in the Specify coordinates boxes.
You can also specify a point interactively by clicking the Specify point button and clicking in the document window.
Set an alignment option for text objects
In the Text area, choose one of the following options:
 
First line baseline — aligns text by the baseline of the first line
 
Last line baseline — aligns text by the baseline of the last line
 
Bounding box — aligns text by its bounding box

You can also align objects with another object quickly, without using the Align and distribute docker, by clicking Arrange Align and distribute and clicking any of the first six alignment commands. The letter next to a command name indicates the keyboard shortcut that you can use to align objects. For example, the letter L next to the Align left command shows that you can press L to align objects with the leftmost point of the object that is used as a reference point.
You can use snapping to precisely specify the alignment point. For more information, see Working with precision.
To distribute objects Back to Top
1.
 
Select the objects.
2.
 
Click Arrange Align and distribute Align and distribute.
3.
 
To distribute objects horizontally, click one of the following buttons:
Distribute left — evenly spaces the left edges of the objects
Distribute center horizontally — evenly spaces the center points of the objects along a horizontal axis
Distribute right evenly spaces the right edges of the objects
Distribute space horizontally — places equal intervals between the objects along a horizontal axis
4.
 
To distribute objects vertically, click one of the following buttons:
Distribute top — evenly spaces the top edges of the objects
Distribute center vertically — evenly spaces the center points of the objects along a vertical axis
Distribute bottom — evenly spaces the bottom edges of the objects
Distribute space vertically — places equal intervals between the objects along a vertical axis
5.
 
To choose the area over which the objects are distributed, click one of the following buttons in the Distribute objects to area:
Extent of selection — distributes the objects over the area of the bounding box surrounding them
Extent of page — distributes the objects over the drawing page

Feedback
Was this page helpful? Send feedback.

Copyright 2013 Corel Corporation. All rights reserved.