Quick links to procedures on this page:
• |
• |
• |
Corel DESIGNER lets you simulate the effect of a calligraphic pen when you draw lines. Calligraphic lines vary in thickness according to the direction of the line and the angle of the pen nib. By default, calligraphic lines appear as closed shapes drawn with a pencil. You can control the thickness of a calligraphic line by changing the angle of the line that you draw in relation to a specified calligraphic angle. For example, when the line that you draw is perpendicular to the calligraphic angle, the line is at the maximum thickness specified by the pen width. Lines drawn at the calligraphic angle, however, have little or no thickness.
By using either a mouse or a pressure-sensitive pen and graphics tablet, you can create pressure-sensitive lines that vary in thickness. Both methods result in lines with curved edges and varying widths along a path. For information about using a pressure-sensitive pen on a graphics tablet, see the manufacturer’s instructions.
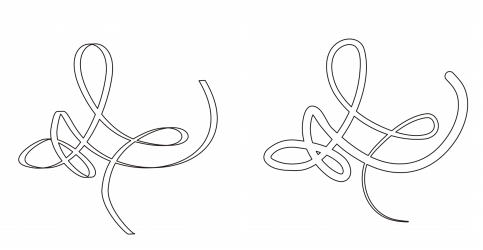
An image drawn by using two different linear pattern lines: calligraphic lines (left), and flat preset lines (right).
You can use preset lines to create thick strokes of various shapes.After you draw a calligraphic or preset line, you can apply a fill to it. For information about applying fills, see Filling objects.
| To draw a calligraphic line |
1. |
In the toolbox, click the Linear pattern tools button, and then click the
Calligraphic tool
|
2. |
Type a value in the Calligraphic angle box on the property bar.
|
3. |
Drag until the line is the shape you want.
|
The width you set is the maximum line width. The angle of the line you draw
in relation to the calligraphic angle determines the line’s actual width.
|
You can also access calligraphic lines by clicking Effects |
| To draw a pressure-sensitive line |
1. |
In the toolbox, click the Linear pattern tools button, and then click the Pressure
tool
|
If you are using the mouse, press the Up arrow or Down arrow to simulate changes in pen pressure, which change the width of the line. |
2. |
Drag until the line is the shape you want.
|
The width you set represents the line’s maximum width. The amount of
pressure that you apply determines the line’s actual width.
|
| To draw a preset line |
1. |
In the toolbox, click the Linear pattern tools button, and click the Linear
pattern preset tool
|
2. |
Choose a line shape from the Preset stroke list box on the property bar.
|
3. |
Drag until the line is the shape you want.
|
|
|
Copyright 2013 Corel Corporation. All rights reserved.