Quick links to procedures on this page:
• |
• |
• |
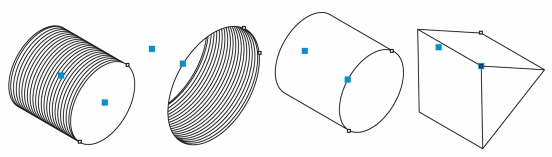
You can draw thread shapes, well shapes, cylinders, and prisms in projected view. These shapes are useful for creating illustrations of bolts, nuts, and well nuts.
You can adjust the length and radius of the projected shapes by specifying values or by moving their control handles in the drawing window.
With thread and well shapes, you can set the distance from the first thread to the start of the object and the distance from the last thread to the end of the object. You can also adjust the pitch, which is the distance in projected space from one thread to the next, or adjust the number of threads per inch.
With prisms, you can specify the number of sides of the base faces.
Examples of projected shapes
| To draw a projected shape |
1. |
Click the Projected shape tools button, and click one of the following tools:
|
• |
Thread
|
• |
Well
|
• |
Cylinder
|
• |
Prism
|
2. |
Drag in the drawing window to set the radius of the shape, then move the pointer
to set the length, and click.
|
| To modify a projected shape |
1. |
Click the Projected shape tools button, and click one of the following tools:
|
• |
Thread
|
• |
Well
|
• |
Cylinder
|
• |
Prism
|
2. |
Click the projected shape, and perform any of the following tasks.
|
The radius, length, and distance values are applied in projected space.
|
| To adjust a projected shape by using control handles |
1. |
Using a projected shape tool, click the shape.
|
2. |
Perform any of the following tasks:
|
|
To
|
Do the following
|
|---|---|
|
Adjust the shape radius
|
Drag the radius control handle.
|
|
Adjust the shape length
|
Drag the length control handle.
|
|
Rotate a prism
|
Drag the radius control handle.
|
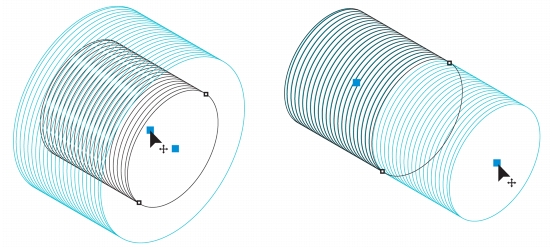
Using control handles to adjust the radius (left) and length (right) of a thread shape
|
|
Copyright 2013 Corel Corporation. All rights reserved.