Quick links to procedures on this page:


Using alignment guides

You can align objects interactively on the drawing page by using alignment guides. Alignment guides are temporary guidelines that appear when you create, resize, or move objects in relation to nearby objects. While dynamic guides provide precise measurements for creating technical illustrations, alignment guides are useful in page layout to align text or graphic elements quickly and accurately.

Alignment guides appear as an object is moved.

Alignment guides help you align the centers and edges of objects. If you want to align an object at a set distance from the edge of another object, you can set margins for the alignment guides. You can display the margin alignment guides in addition to other alignment guides, or disable all other alignment guides and show only the margin alignment guides.

Margin alignment guides let you use offset margins, inset margins, or both. There are separate controls for horizontal and vertical margin alignment guides, so you can modify settings for one without affecting the other.

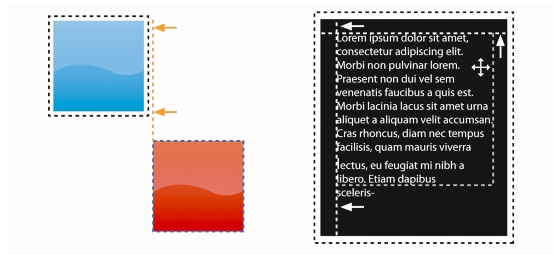
You can offset (left) and inset (right) margin alignment guides.

Alignment guides are turned off by default. You can easily enable or disable alignment guides, or modify their default settings, including the color and line style. You can choose whether alignment guides appear for individual objects in a group, or for the bounding box of the group as a whole.

The Intelligent Spacing feature lets you precisely arrange and position an object in relation to other onscreen objects, and the Intelligent Dimensioning feature lets you intuitively scale and rotate an object in relation to other onscreen objects.

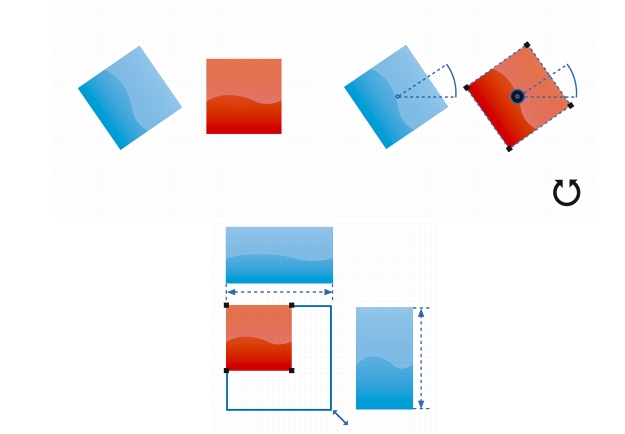
Intelligent Dimensioning displays indicators when an object is rotated to the same angle (top) or scaled to same size (bottom) as the closest object.

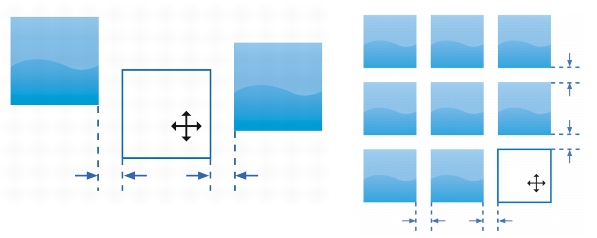
Intelligent Spacing displays indicators when an object is equidistant from two other objects (left) or has the same spacing as the closest onscreen objects (right).

To enable or disable alignment guides Back to Top
1.
 
Click Tools Alignment and dynamic guides.
2.
 
In the Alignment and dynamic guides docker, click the Alignment guides button .
3.
 
Enable or disable the check box in the upper-right corner of the Alignment guides section.
You can also enable or disable alignment guides by clicking the Alignment guides button on the Layout toolbar. To open the Layout toolbar, click Layout Layout toolbar or View Toolbars Layout.
You can also enable alignment guides by pressing Shift + Alt + A.
To modify alignment guide settings Back to Top
1.
 
Click Tools Alignment and dynamic guides.
2.
 
In the Alignment and dynamic guides docker, click the Alignment guides button .
3.
 
Perform any of the following tasks.

To
Do the following
Change the color of alignment guides
Open the Line color picker, and choose a color.
Change the line style of alignment guides
Open the Line style picker, and choose a line style.
Set guides to align the edge of an object with the edge of another object
Click the Object edges button .
Set guides to align the edge of an object with the center of another object
Click the Object centers button .
Set guides to align to individual objects in a group
Click the Individual objects in a group button .
Distribute objects using the same spacing as the closest onscreen objects
Ensure that the Intelligent spacing button is enabled, and drag the object until indicator arrows appear.
Position an object equidistantly between two other objects
Ensure that the Intelligent spacing button is enabled, and drag the object between two other objects until indicator arrows appear.
Scale objects to the same dimensions as other onscreen objects
Ensure that the Intelligent dimensioning button is enabled, and scale the object until indicator arrows appear.
Rotate objects to the same angle as other rotated onscreen objects
Ensure that the Intelligent dimensioning button is enabled, and rotate the object until rotation indicators appear.

You can access some alignment guide controls on the Layout toolbar by clicking the Layout toolbar button .
To add margin alignment guides Back to Top
1.
 
Click Tools Alignment and dynamic guides.
2.
 
In the Alignment and dynamic guides docker, click the Alignment guides button .
3.
 
Perform any of the following tasks.

To
Do the following
Add margin alignment guides
Enable the Margins check box. If the Margins check box is not displayed, click the arrow button located at the bottom of the Alignment guides section.
Change the line color of margins
Open the Margin line color picker, and choose a color.
Change the line style of margins
Open the Margin line style picker, and choose a line style.
Set horizontal margins
Type a value in the Horizontal margin box, click the Horizontal margin button, and choose one of the following options:
 
Offset horizontally — creates a margin of the specified distance around an object
 
Inset horizontally — creates a margin of the specified distance within an object
 
Offset and inset horizontally — creates margins of the specified distance around and within an object
Set vertical margins
Type a value in the Vertical margin box, click the Vertical margin button, and choose one of the following options:
 
Offset vertically — creates a margin of the specified distance around an object
 
Inset vertically — creates a margin of the specified distance within an object
 
Offset and inset vertically — creates a margin of the specified distance around and within an object
Lock the ratio between vertical and horizontal margins
Click the Lock ratio button
View only margin alignment guides
Disable the Object edges button , the Object centers button , the Intelligent spacing button , and the Intelligent dimensioning button .
Disable horizontal margins
Click the Horizontal margin button, and choose No horizontal margin .
Disable vertical margins
Click the Vertical margin button, and choose No vertical margin .


Feedback
Was this page helpful? Send feedback.

Copyright 2013 Corel Corporation. All rights reserved.