Import RAW camera files in Corel PHOTO-PAINT


When you open single or multiple RAW camera files in Corel PHOTO-PAINT, they are first displayed in the Camera RAW Lab. You can use the controls in the Camera RAW Lab to adjust the color and tone of the RAW camera images. If you are satisfied with the adjustments of a file, you can apply the same adjustments to the remaining files.

After processing RAW camera files, you can edit them further by using the tools and effects available in Corel PHOTO-PAINT. Then, you can save the RAW camera files as TIFF or JPEG files, or you can save them to any other file format supported by Corel PHOTO-PAINT.

Note that RAW camera files cannot be saved to a RAW camera file format in Corel PHOTO-PAINT. Any changes made to the RAW camera files in the Camera RAW Lab are lost unless you save the files to a supported file format.

Processing RAW camera files

The Camera RAW Lab includes controls that are organized in a logical order for color correction and other adjustments of RAW camera images. It is recommended that you start from the top of the Color page and work your way down. Once you finish correcting the color and tone of your image, you can sharpen it and remove noise by using the controls on the Detail page. For information about the settings on the Color page, see Adjust the color and tone of RAW camera files. For information about the settings on the Detail page, see Sharpen RAW camera files and reduce noise.

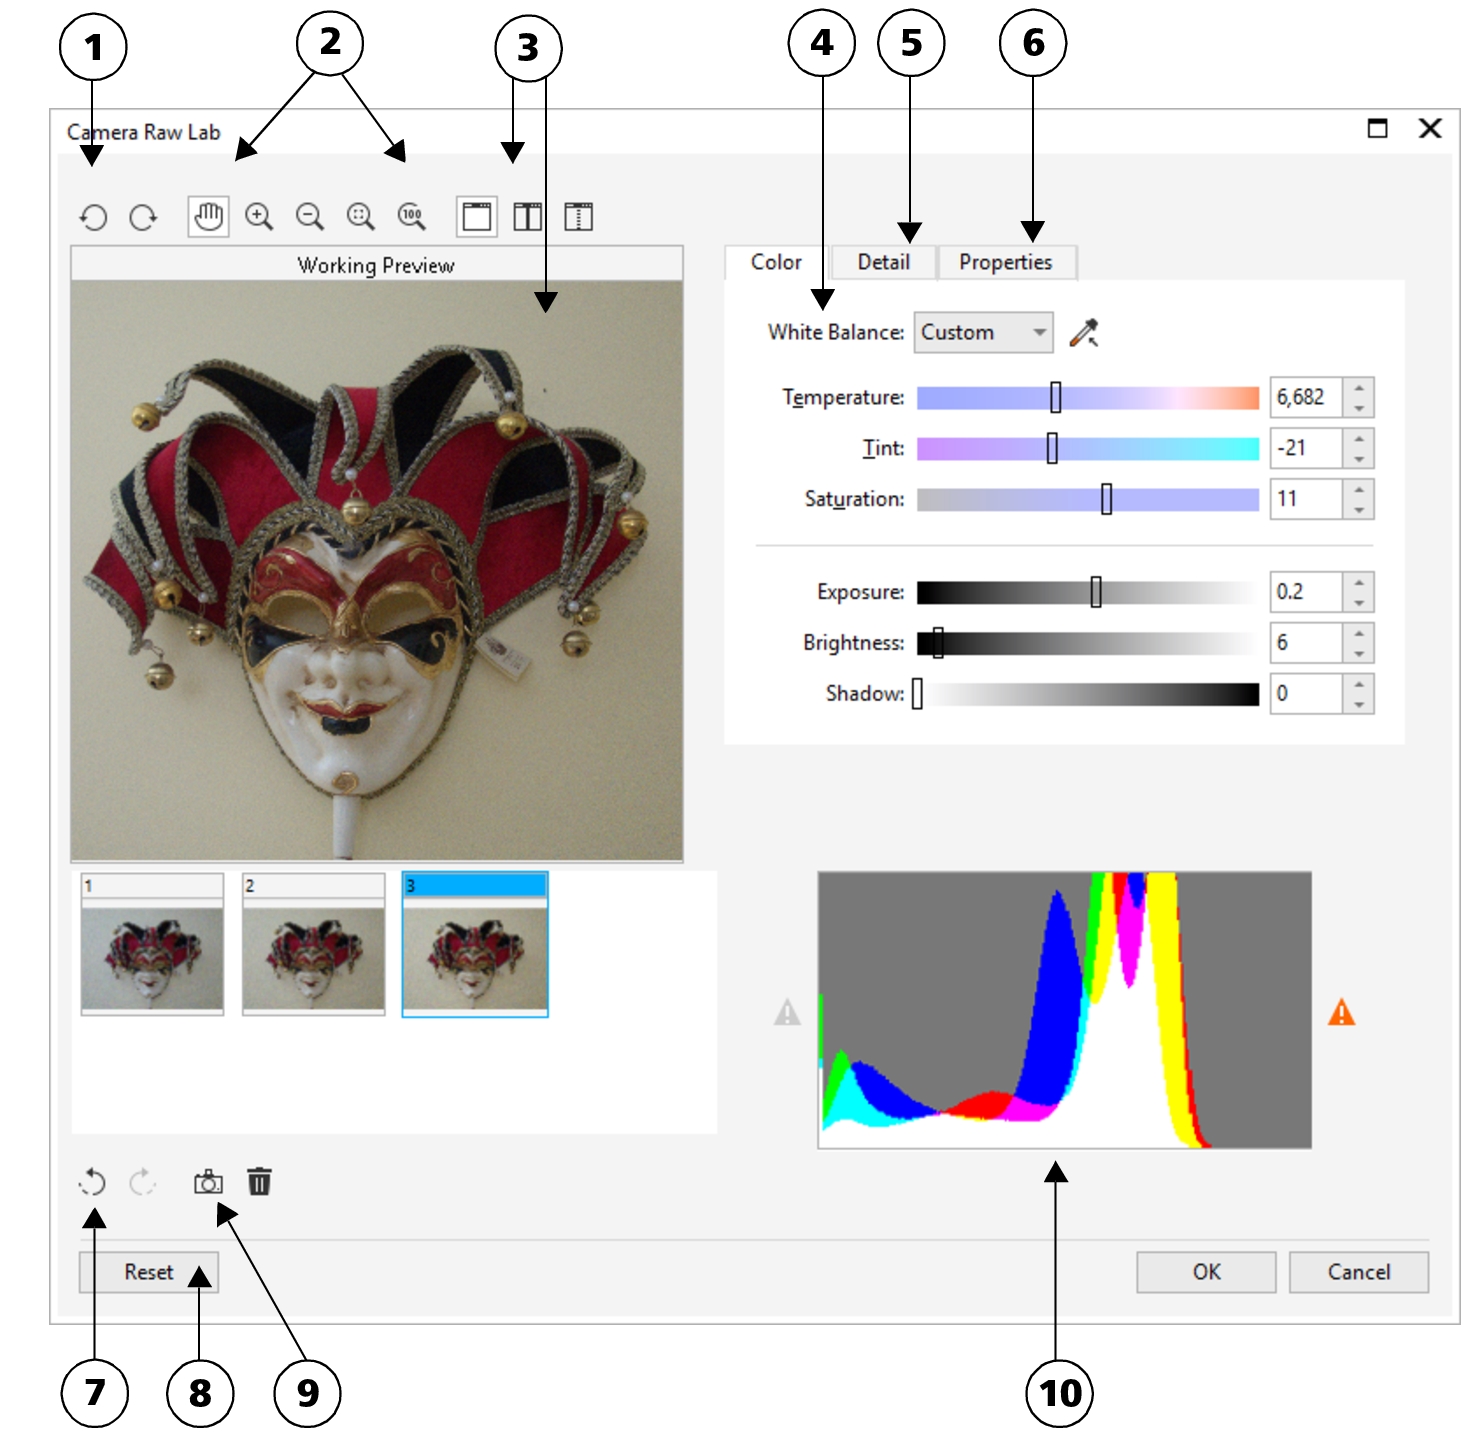
Camera RAW Lab: circled numbers correspond to the numbers in the following table, which describes the main components of the lab.


Component
Description
1. Rotation tools
Let you rotate the image 90 degrees clockwise and counterclockwise
2. Zooming and panning tools
Let you zoom in and out of an image displayed in the preview window, pan an image displayed at a zoom level higher than 100%, and fit an image to the preview window
3. Preview modes and Preview window
Let you preview the adjustments made to a RAW camera image in a single or split window. To compare the original and the adjusted image, you can display them side by side.
4. Color page
Contains controls that let you adjust the color and tone of RAW camera images to remove color casts and reveal hidden detail
5. Detail page
Contains controls that let you remove noise from RAW camera images
6. Properties page
Contains controls that let you view information about a RAW camera image, such as size, color mode, and camera settings
7. Undo and Redo buttons
Let you undo and redo the last action you performed
8. Reset button
Lets you clear all corrections so that you can start with the original RAW camera image
9. Create snapshot
Lets you capture the corrected version of an image in a "snapshot" at any time. Thumbnails of the snapshots appear in a window below the image.
10. Histogram
Lets you preview the tonal range of the image.

To import a RAW camera file

Back to Top
1 Click File Import.
2 Select a RAW camera file or multiple RAW camera files, and click Open or Import.
3 In the Camera RAW Lab, adjust the color and tone of the RAW camera image. If necessary, you can also sharpen the image and reduce the amount of noise.
If you selected multiple RAW camera files and want to apply the same adjustments to all of them, enable the Apply to all remaining files check box.

*

You can crop or resample a RAW camera image before processing it in the Camera RAW Lab. For more information, see To crop an image while importing and To resample an image while importing.

You can rotate the image by clicking the Rotate left button or Rotate right button .

Was this page helpful? Send feedback.


The features documented in the Help are available in the full version of CorelDRAW Graphics Suite 2021. Some features may not be available in this version of the product.