Quick links to procedures on this page:
• |
• |
• |
• |
You can hide an object from view, align an object to image elements, distribute objects throughout an image, and change the stacking order of objects.
By default, all objects are displayed in the image window. However, you can hide an object to make it temporarily invisible.
Objects can be aligned to each other, to the center of the image, to the grid and guidelines, or to the image window. For information about aligning objects to the grid and guidelines, see Using the guidelines, grid, and rulers.
You can distribute objects by spacing them equal distances apart. Objects can be distributed vertically, horizontally, or both. Distribution is based on the distance between the centers of selected objects, or on the space between the adjacent edges of the objects.
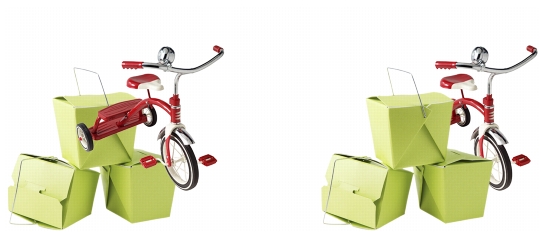
When you create multiple objects in an image, they are stacked on top of one another in the order in which they were created. The most recently created object is at the top of the stack, and the image background is at the bottom. You can move an object in the image window to cover an object that is lower in the stacking order; however, an object always displays behind objects that are higher in the stacking order. Changing the stacking order of objects brings hidden objects into view or places the topmost objects behind other objects.

Changing the stacking order places the bike behind the boxes.
| To hide or display an object |
• |
If the Objects docker is not open, click Window |
When an object is hidden, the Hide/Show icon |
When you hide the background, a checkered transparency grid displays. To
customize the transparency grid, click Tools |
| To align an object |
1. |
Select an object.
|
2. |
Click Object |
3. |
Click the Align tab.
|
4. |
Enable one of the following options:
|
• |
To active — aligns the selected objects to the active object. This option is
available only when multiple objects are selected.
|
• |
To center of document — aligns the selected object to the center of the image
window
|
• |
Selected to document — aligns the selected object to the image window
|
5. |
Enable any of the horizontal and vertical alignment check boxes.
|
If you want to preview the alignment in the image window, click Preview |
You can align the object to the nearest grid point by enabling the Align to grid
check box.
|
| To distribute objects |
1. |
Select the objects.
|
2. |
Click Object |
3. |
Click the Distribute tab.
|
4. |
Enable one of the following options:
|
• |
To extent of selection — evenly spaces the selected objects
|
• |
To extent of document — evenly spaces the objects across the image
|
• |
By object spacing — lets you specify the distance between objects in the X and
Y boxes
|
5. |
Enable any of the horizontal and vertical distribution check boxes.
|
If you want to preview the distribution in the image window, click Preview |
To distribute objects, you must have more that one object selected.
|
| To change the order of objects |
1. |
Select an object.
|
2. |
Click Object |
• |
To front — places the selected object in front of all objects in the image
|
• |
To back — places the selected object behind all objects in the image
|
• |
Forward one — places the selected object in front of the object it is currently
behind
|
• |
Back one — places the selected object behind the object it is currently in front
of
|
• |
Reverse order — reverses the stacking order of the selected objects. This
command is available only when multiple objects are selected.
|
The image background is always placed at the bottom of the stacking order
and no object can be placed below it.
|
When objects are grouped, they are considered to be at the same level in the
stacking order. Therefore, you cannot place an object between individual
objects in a group.
|
You can change the stacking order of an object by dragging its thumbnail to a
new position in the Objects docker. If the Objects docker is not open, click
Window |
You can also change the order of objects using shortcut keys. Move an object
to the top of the stack by pressing Shift + Page up; move it to the bottom of
the stack, but above the background, by pressing Shift + Page down; move
it up one step in the stacking order by pressing Ctrl + Page up; and move it
down one step by pressing Ctrl + Page down.
|
|
|
Copyright 2012 Corel Corporation. All rights reserved.