Adjusting and creating Impasto brushes
The Impasto brush controls let you modify Impasto brush variants, or transform other brush variants into Impasto brushes. The controls let you set drawing and depth methods, set the amount of depth applied, and modify brush interaction. The impasto settings act identically to other brush settings, in that they’re saved as part of a brush variant or applied to any active brush. For more information, see Adjusting brushes with brush controls.
Setting an impasto drawing method
The impasto drawing methods control the amount of color and depth that the brush applies to the canvas. When you change the drawing method, it affects the next brushstroke that you apply to the canvas.
Setting an impasto depth method
The impasto Depth Method lets you choose a control medium for applying depth. Corel Painter uses the luminance (brightness) information in the control medium to determine how much depth is applied within a stroke. Light areas of the medium receive more depth; dark areas receive less. Black areas appear flat.
For example, when you use Paper as the Depth Method, the bright and dark areas of the paper grain determine where grooves and bumps appear in the brushstroke.
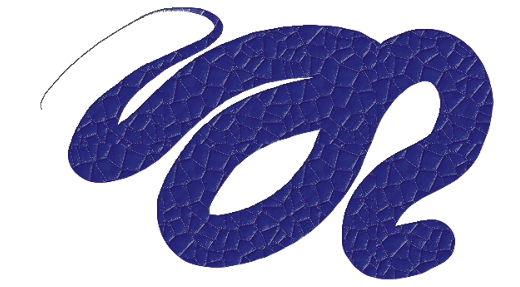
This Impasto brushstroke is produced when Paper is used as the Depth Method.
You can set the impasto Depth method to use the selected texture. For more information about texture painting and Texture brushes, see Texture painting and Customizing Texture brushes.
The impasto depth method option is not supported by all brush types.
Controlling the depth interaction of a medium
If the brush variant that you chose allows you to select a Depth Method, you can also adjust various settings that alter the way the brushstrokes interact with the canvas and other brushstrokes.
You can invert the depth method to apply the negative of the source in a brushstroke. For example, if you invert the depth using Weaving Luminance, light areas of the weave become dark and vice versa.
You can also apply negative depth, which allows you to use a brushstroke to excavate, or dig into the paint.
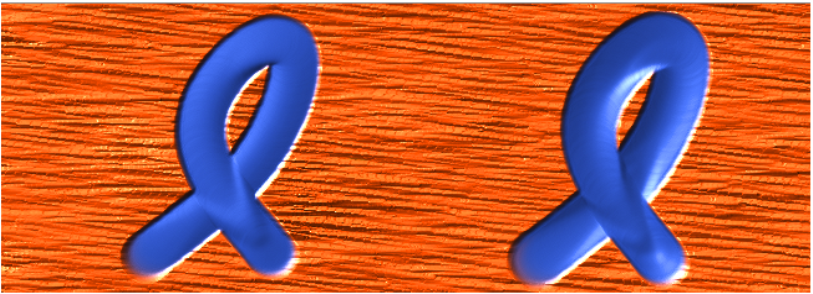
The Negative depth option forces impasto to excavate (left). Normally, impasto raises ridges and bumps (right).
In addition, you can specify how Impasto interacts with previously applied brushstrokes. For example, you can adjust the Plow strength so when a brushstroke with a high Strength value encounters another Impasto brushstroke, it displaces the depth of the existing brushstroke. In essence, the brushstroke "plows" through existing brushstrokes. This technique produces realistic effects.
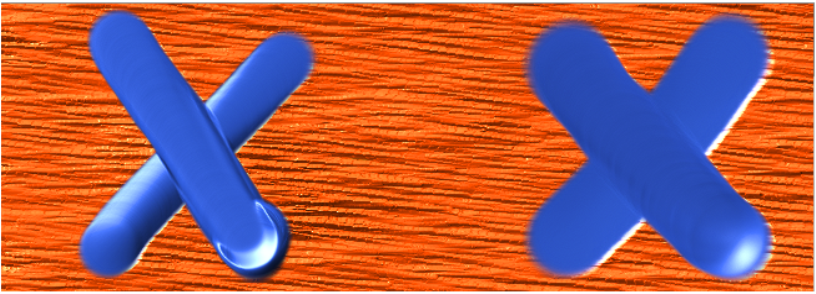
The effects of high (left) and low (right) Plow settings
You can apply one of the nine depth Expression settings to control the flow of depth based on stylus pressure, velocity, or bearing. You can also invert the depth Expression setting to create a different effect. For example, if you set depth Expression to Pressure and the Invert option is enabled, less depth is applied as you press harder, just as it would if you were using a real brush. For more information, see Expression settings.
You can also adjust the Min setting to specify the range of variability that you want the expression to apply. The Min Depth setting represents a percentage of the Depth setting and it must be linked to an expression to have an effect. For example, if you choose the Pressure expression on the Impasto panel, set the Depth slider to 20%, and then set the Min Depth slider to 50%, the depth will vary from 10% to 20% every time you apply pressure to the stylus.
You can increase the variation of depth that is applied by adjusting the Depth Jitter. You can also use the Smoothness slider to smooth the depth jitter in a brushstroke for a more organic look.
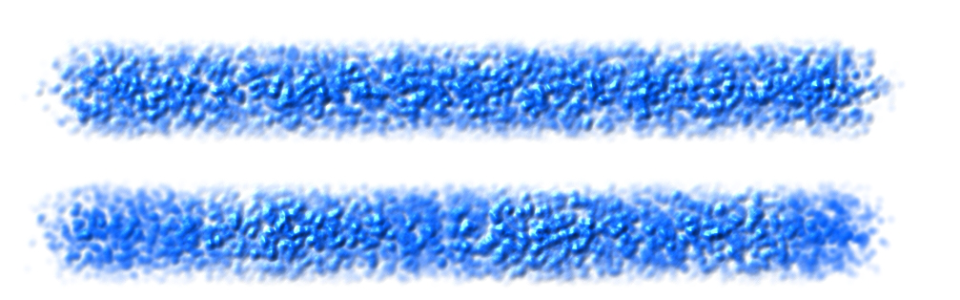
Depth Jitter applied to a brushstroke without jitter smoothing (top) and with jitter smoothing (bottom)
For a list of sample Impasto brushstrokes, see Impasto.
To choose an impasto drawing method
To control the appearance of depth
When painting with an Impasto brush variant, you can click the Impasto flyout button ![]() on the property bar to quickly adjust the Depth value.
on the property bar to quickly adjust the Depth value.
The Impasto depth method option is not supported by all brush types.
You can create Impasto brush variants using only stamp-based dab types, such as Circular, Static Bristle, and Computed Circular.
When a brushstroke with a high Plow value encounters another Impasto brushstroke, it displaces the depth of the existing brushstroke. In essence, your brushstroke "plows" through existing brushstrokes.
For a realistic effect, try varying Depth inversely with Pressure. Set the Expression list box to Pressure, and enable the Invert option. This lets you apply paint more thickly when you press lightly, but more thinly when you press firmly, just as if you were using real paint.
To control the depth interaction
When a brushstroke with a high Plow strength value encounters another Impasto brushstroke, it displaces the depth of the existing brushstroke. In essence, your brushstroke "plows" through existing brushstrokes.
For a realistic effect, try varying Depth inversely with Pressure. Set the Expression list box to Pressure, and enable the Invert option. This lets you apply paint more thickly when you press lightly, but more thinly when you press firmly, just as if you were using real paint.
When adjusting Depth Jitter, make sure the Min Depth slider is not set to 100%. Setting the Min Depth to 100% stops Depth Jitter from occurring.