Creating and managing brush dabs
You can create your own brush dabs by creating a shape, selecting it, and then capturing it as a dab. You can also capture a brush dab from any portion of your document, including multiple layers, by making a rectangular selection. And you can import an image to use as a captured dab, set a custom icon, and rename a captured dab. In addition, when you are painting with a brush that uses a Captured dab type, you can save the brush dab to the captured dab library.
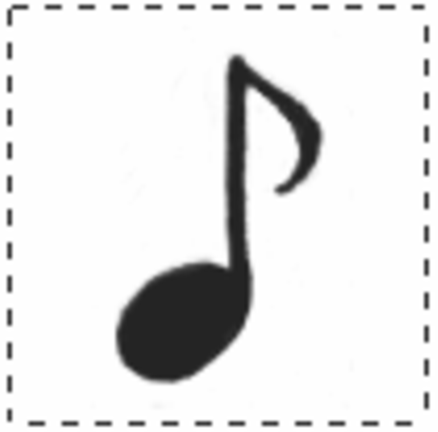
This musical note was captured as a brush dab.
You can customize the appearance of brush dabs. You can instantly alter the dab shape of any brush, adjust settings, apply a new dab effect, and even capture your new dab for use with other brushes. For more information, see Captured dab controls.
To create a brush dab from scratch

1
On a white background, draw a shape in black color.
Brush dabs are grayscale. Use shades of gray to define the transparent areas of the dab.
To follow stroke direction, a captured brush dab must face toward the right side.
2
Choose the
Rectangular Selection tool

from the toolbox, and drag across your shape to create a selection.
3
Click the Brush Selector on the Brush Selector bar, and choose the brush category and variant for which you want to save the captured dab.
For optimal results, try a stamp-type variant that uses a
Captured,
Circular,
Computed Circular, or
Static Bristle dab type. You can find such variants by choosing
Window  Search
 and typing a dab type in the
Search text box. You can also use the
Stamps brush filter to show only stamp-type brushes in the brush library. For more information, see
Filtering brushes.
4
Choose
Brushes Capture Dab.
5
In the
Save to Captured Dab Library dialog box, type a name for the captured dab in the
Save As text box, choose a library from the
Captured Dab Library list box, and then click
Save.
The captured dab will be added to the library of your choice in the
Captured panel.
To open the
Captured panel, choose
Window Brush Control Panels Brush Shape Captured.
6
Choose
Select None, and draw with the brush on the canvas.
If you like the results you’ve captured, you can save the brush as a new variant. For information about how to save customized brushes for later use, see
Saving and deleting brush variants.

If the brush is not painting after capturing a dab, choose Window Brush Control Panels Brush Shape Captured. In the Captured panel, either choose None from the Dab Effect list box or adjust the Strength slider to reduce the strength of the dab effect.
Corel Painter uses the area you selected in step 2 to set the brush size. When the brush is created, the selected area is sampled to compute each brush dab.
If the original area requires scaling to the size of the brush dab, sampling can appear aliased. The greater the scaling, the more aliasing is apparent. To prevent too much aliasing from appearing, create a shape with soft (grayscale) edges that is close to the size you’ll be using.
You can paint with a captured brush dab just as you would with other brushes.
To capture a brush dab from a selection
1
Choose the
Rectangular Selection tool
from the toolbox, and drag across the area that you want to capture.
You can make a selection that includes content from multiple layers; however, transparency is not supported.
2
Click the Brush Selector on the Brush Selector bar, and choose the brush category and variant for which you want to save the captured dab.
For optimal results, try a stamp-type variant that uses a
Captured,
Circular,
Computed Circular, or
Static Bristle dab type. You can find such variants by choosing
Window Search and typing a dab type in the
Search text box. You can also use the
Stamps brush filter to show only stamp-type brushes in the brush library. For more information, see
Filtering brushes.
3
Choose
Brushes Capture Dab.
4
In the
Save to Captured Dab Library dialog box, type a name for the captured dab in the
Save As text box, choose a library from the
Captured Dab Library list box, and then click
Save.
The captured dab will be added to the library of your choice in the
Captured panel.
To open the
Captured panel, choose
Window Brush Control Panels Brush Shape Captured.
5
Choose
Select None, and draw with the brush on the canvas.
If the brush is not painting after capturing a dab, choose Window Brush Control Panels Brush Shape Captured. In the Captured panel, either choose None from the Dab Effect list box or adjust the Strength slider to reduce the strength of the dab effect.
To save a captured dab from the currently selected brush
1
Choose
Brushes Save Dab To Captured Dab Library.
2
In the
Save to Captured Dab Library dialog box, type a name for the captured dab in the
Save As text box, choose a library from the
Captured Dab Library list box, and then click
Save.

You can also save a captured dab from the currently selected brush in the Captured panel. Choose Window Brush Control Panels Brush Shape Captured, and then click the Save a captured dab from the currently selected brush button  .
.
To import a captured dab
2
In the
Captured panel, click the
Import Captured Dab button

.
3
In the
Import Captured Dab dialog box, navigate to the folder containing the JPEG or PNG that you want to import, select it, and click
Open.
|
|
|
|
|
In the Captured panel, right-click a captured dab, and click Rename Captured Dab. In the Rename dialog box, type a new name, and click OK. |
|
|
In the Captured panel, right-click a captured dab, and click Set Custom Icon. In the Import Captured Dab dialog box, navigate to the folder containing the image you want to use, select it, and click Open. |
|
|
In the Captured panel, right-click a captured dab, and click Hide Captured Dab. |
|
|
In the Captured panel, choose a captured dab, and click the Delete Captured Dab button  . |