Creating a mosaic
You can create a mosaic from scratch or from a clone source. When you create a mosaic, it is applied directly to the canvas. You cannot apply mosaic tiles inside a layer.
After you exit the Mosaic and Tessellation dialog box, you can treat this rendered image just like any photograph or painting. You can paint it, apply effects to it, select portions of it, or increase the canvas size. You can also integrate mosaic effects into an existing image. For information, see Adding mosaic effects to an image.
After you apply tiles to a mosaic, you can select, deselect, or remove tiles to change their color or apply effects to them. For information, see Selecting and removing tiles and Specifying tile and grout color.
When creating mosaics from scratch, you can follow these helpful guidelines:
•
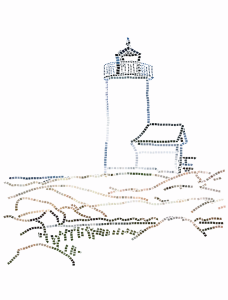
Use your first few courses of mosaic tiles to delineate the most important contours of your subject — just as if you were drawing with a pencil. Describe the most important lines of your scene first. Additional courses of tiles should follow the initial contours.
Tiles applied to the outline of an image
•
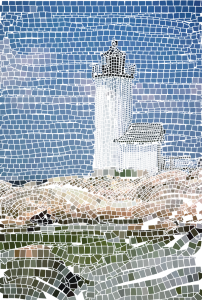
Use larger tiles in areas of flat color and smaller tiles in regions where you must add more detail. In flat-color areas, you may want to introduce some color variability for a more realistic effect. Tiles used in traditional mosaics rarely have uniform color.
•
Each mosaic tile is stored as a resolution-independent object within the Corel Painter image database. This means that if you resize an image composed of mosaic tiles, your image can be displayed at the same quality as if it had been created at a higher resolution originally.
•
If you’re working with a clone, tracing paper is enabled by default to help you follow the source image.
You can create a mosaic from a clone with tracing paper turned off to hide the clone source image.
•
If you want to continue working on the mosaic at a later date, you need to save mosaic in the RIFF format. RIFF is the only file format that saves resolution-independent mosaic tile objects. Saving in any other format prohibits you from resuming working on the mosaic. All file formats will save the rendered image of the mosaic tiles on the canvas. For more information, see
Saving and backing up files.To create a mosaic from scratch

1
Start a new document by choosing
File  New
New.
2
Choose
Effects Esoterica Make Mosaic and Tessellation.
3
Click the
Grout color chip, and choose a color.
4
Click the
Tile color chip, and choose a color
5
Drag in the document window to apply tiles.
6
If you want to continue working on the mosaic, keep the
Mosaic and Tessellation dialog box open.

For more information about changing the grout and tile color, see Specifying tile and grout color.

You can also change tile dimensions and shape. For more information, see Adjusting mosaic tile dimensions and randomness.
You can also specify that Corel Painter automatically fill an area with tiles by choosing Stroke/Fill Selection from the Action list box in the Mosaic and Tessellation dialog box. For more information, see Stroking and filling a selection with mosaic tiles.
To create a mosaic from a clone source
1
Choose
File Open, and locate the file that you want to clone.
2
Choose
File Quick Clone.
3
Choose
Effects Esoterica Make Mosaic and Tessellation.
4
In the
Mosaic and Tessellation dialog box, choose
Apply Tiles from the
Action list box.
If you don’t want to work with tracing paper, disable the
Use tracing paper check box.
5
Enable the
Clone color check box.
6
Drag in the document window to apply tiles.
If you want to continue working on the mosaic, keep the
Mosaic and Tessellation dialog box open.
You can monitor the progress of the clone-based mosaic by viewing the image with the Use tracing paper check box enabled. This lets you see a faded out version of the clone source.