Creating textures
You can use the preset textures provided with Corel Painter. In addition, you can import or create custom textures.
You create a texture by capturing the canvas or a layer. You can also create a texture from a selected area in an image. Textures are saved in the Corel Painter texture library format.
You can also create a texture by using Texture synthesis. The effect lets you generate a new image based on elements of a source texture or document. Corel Painter reproduces the original image on a larger scale by using all the visual elements in the input sample. Use the effect to expand small textures and create textures from brushstrokes in your document.
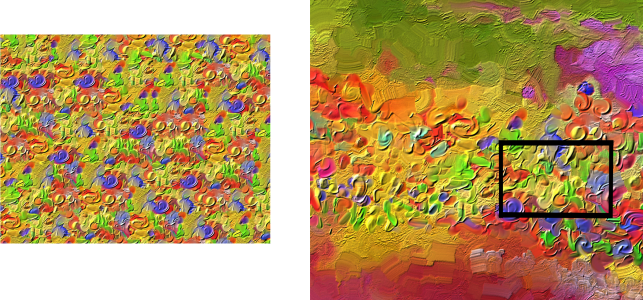
Corel Painter generates a large texture (left) from a small sample (right) by taking into account its structural content. Image (right) by Henk Dawson
First, choose a source image. You can synthesize an image from a texture or from content in a Corel Painter document. When choosing a source image, you may find the following tips helpful.
Next, define an area within the source image that you want to use as an input sample. For best results, select a small area.
Once you decide which area you want to sample, you have to define the size of the synthesis building blocks — the tiles. The texture synthesis process works by taking an input seed — a tile — and randomizing it. The tile size you choose depends on the source image. In images with repeated shapes, lines, or colors, you can get good results with small tiles; in images without patterns, bigger tiles will allow you to include all the elements you need. Start with a tile size that is about 20% of the selection size, and experiment with increasing or decreasing the tile size until Corel Painter generates a pattern that you like.
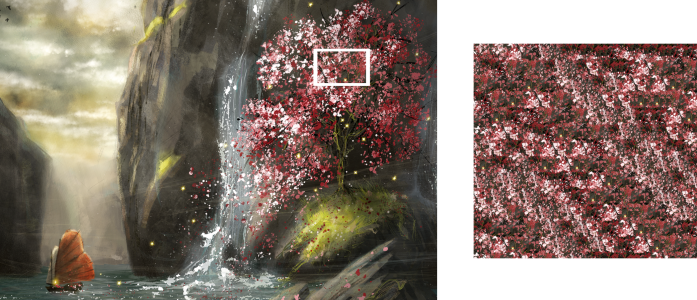
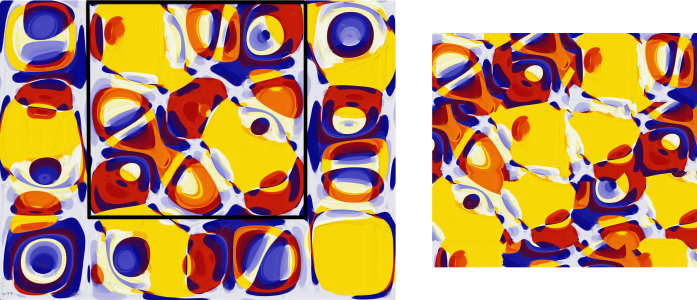
Top: A small tile is selected in a texture with repeated elements. Artwork by Michelle Webb. Bottom: A big tile is selected in a texture without a pattern to include more details. Artwork by Michael Pierre Price.
You can regenerate a texture multiple times. Every time you apply the effect, Corel Painter creates an image with a different pattern and associates a random value — called a seed — with that pattern. You can manually enter random seed values, or you can let Corel Painter automatically generate them. The advantage of entering the seed values manually is that, as you try different values, you can choose the value that produces the desired result and reapply it. Preview the result in the document window and experiment until Corel Painter generates a pattern that you like.
When you are satisfied with the appearance, you can save the resulting image as a texture in the currently selected Texture library or send it to a new layer. You can specify the width and height of the resulting image. The maximum document size is 16 382 by 16 382 pixels; however, it may take a long time to synthesize images that exceed 2500 pixels.
All preset and custom textures are stored in libraries. For more information, see Working with Texture libraries.
To create a texture by capturing an area
When you create a texture from a layer, Corel Painter preserves the transparent areas.
To create a texture by using Texture synthesis
If texture synthesis doesn’t start, try one of the following:
If the texture that you want to synthesize is bigger than the size of your document, you will not be able to see the entire texture when sending the texture to a new layer.
For best results, use images with similar color cast, brightness, and contrast across the image. To improve the variance of an image, open the image in Corel Painter, click Effects ![]() Tonal Control
Tonal Control ![]() Match Palette, move the Variance (Color) and Variance (Brightness) sliders to the left to reduce the color and brightness variance, and click OK.
Match Palette, move the Variance (Color) and Variance (Brightness) sliders to the left to reduce the color and brightness variance, and click OK.
If the colors in the source image don't match, try creating a grayscale version of the image. Click Effects ![]() Tonal Control
Tonal Control ![]() Adjust Colors. Move the Saturation slider to the left for a less colorful image, or choose the lowest value for pure grayscale, and click OK. This is also useful for synthesizing textures that don't require color, such as images for papers and flow maps.
Adjust Colors. Move the Saturation slider to the left for a less colorful image, or choose the lowest value for pure grayscale, and click OK. This is also useful for synthesizing textures that don't require color, such as images for papers and flow maps.
If the appearance of the resulting image is too repetitive, enable the Scramble option or try decreasing the tile size. If the resulting image is lacking in detail or objects or features are cut out of the source image, try increasing the tile size.
If texture synthesis is taking a long time, try making a small selection (for example, 250 pixels by 250 pixels) and choosing a small output size (for example, 1000 pixels by 1000 pixels) first.
To import a texture
You can also import multiple textures.
Transparency is supported only for PNG images.
The size of the texture depends on the original size of the image that you import. If you prefer not to resize the texture in Corel Painter, make sure you import it at the size you need it. For best results, use high-resolution images.
The texture that you import should not exceed the maximum size of 16 382 x 16 382 pixels.