Liquid Ink controls
Liquid Ink controls work with Liquid Ink layers. You can use the Liquid Ink controls to specify qualities such as type, smoothness, and volume of a brushstroke. You can adjust the Liquid Ink controls when you select a Liquid ink brush.
Liquid Ink is divided into two basic properties: Ink and Color. The Ink component provides the form of the brushstroke, while the Color component applies color to the Ink form. The Ink and Color components can be used together or controlled separately.
The following describes the available Ink types.


Smoothness controls the "tack" of the brushstrokes. Lower values result in coarser brushstrokes. Higher values cause brushstrokes to appear smoother.
Brushstrokes with Smoothness set to 0% (top) and 100% (bottom)
Volume controls the height of the brushstroke, or the amount of medium applied to the image. Higher values result in thicker strokes.
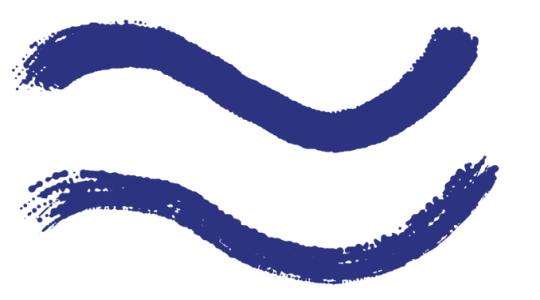
Brushstrokes with Volume set to 100% (top) and 500% (bottom)
You can also use the Expression settings to link Volume to various stylus or mouse movements. For example, you can link Volume to the Wheel expression to control the amount of spray from the Liquid ink airbrush by adjusting the wheel on the airbrush stylus. The wheel on the stylus acts like a needle control on a real airbrush.
Volume can also be linked to audio input from your microphone, or internal audio such as streaming music. For more information, see Audio Expression.
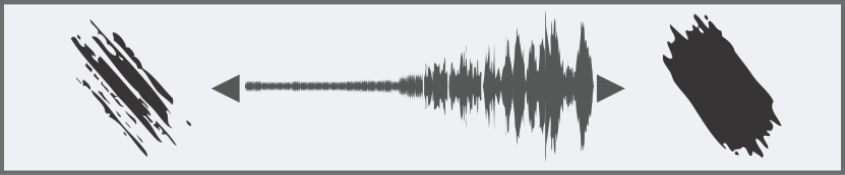
Using Audio Expression to vary Volume
In addition, you can adjust the Min Volume setting to specify the range of variability that you want the expression to apply. The Min Volume setting represents a percentage of the Volume setting and it must be linked to an expression to have an effect. For example, if you choose the Wheel expression on the Liquid Ink panel, set the Volume slider to 40%, and then set the Min Volume slider to 50%, the volume will vary from 20% to 40% every time you use the stylus wheel to apply spray.
You can use the Depth controls to give Liquid Ink brushstrokes the appearance of height. For more information about Depth controls, see Impasto controls.
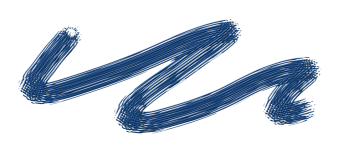
Volume Jitter controls the randomness in volume within the brushstroke. A value of zero results in a perfectly smooth brushstroke.
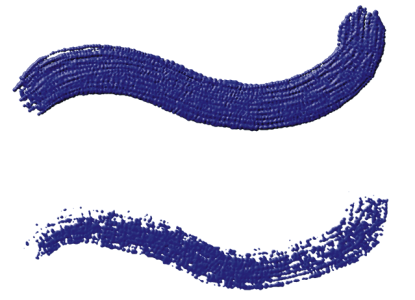
Brushstrokes with Volume Jitter set to 0% (top) and 100% (bottom)
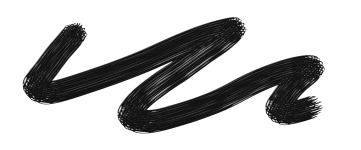
Size Jitter controls the randomness in size within a brushstroke. A value of zero results in a perfectly smooth brushstroke.
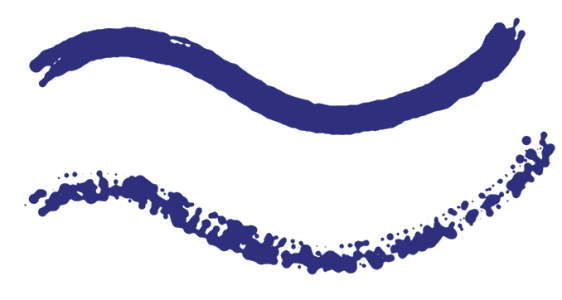
Brushstrokes with Size Jitter set to 0% (top) and 100% (bottom)
Setting the appearance of ink droplets
Descriptions of the controls in the Ink Droplets area follow.
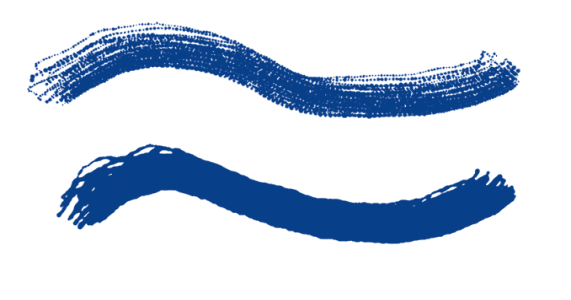
Thickness controls the thickness of the bristles. Higher values cause the bristles to stick together and result in a smoother brushstroke. Lower values cause the individual brushstrokes to become visible.
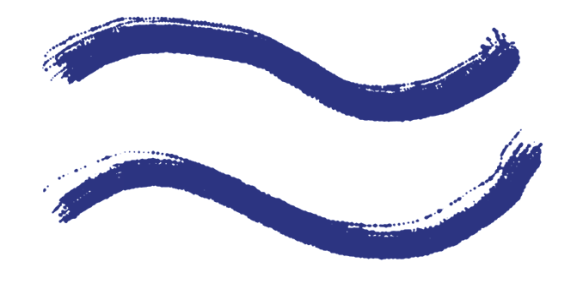
Brushstrokes with Thickness set to 3% (top) and 20% (bottom)
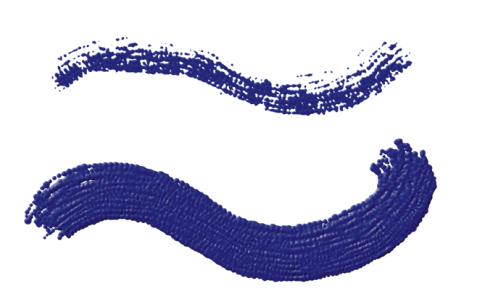
Volume Jitter controls the variation in bristle height (length). A value of zero signifies that all the bristles are of equal height.
Brushstrokes with Volume Jitter set to 0% (top) and 75% (bottom)
Size Jitter controls the variation in bristle width. A value of zero signifies that all the bristles are of equal width.
Brushstrokes with Rand Br Size set to 0% (top) and 100% (bottom)
Feature lets you adjust the size and count of the ink droplets. When used with a Particle brush, this control affects only the size of the particles. When used with a Bristle brush, both bristle size and count are impacted.
For a list of sample Liquid Ink brushstrokes, see Liquid Ink.