Quick links to procedures on this page:
To quickly get started with texture painting, choose any of the brush variants available in the Texture brushes category. In addition, Corel Painter gives you full control to create custom Texture brushes.
There are a number of different methods that allow you to specify whether a Texture brush uses the color, luminance, or both the color and luminance information of a selected texture and whether it interacts with paper grain.
An example of a Texture brush variant (left), a Grainy Texture Luminance brush variant (middle), and a Grainy Texture Chroma variant (right)
You can control the amount of texture that a brushstroke reveals.
A brush with (left) 50% Strength and (right) 100% Strength
You can also specify how Texture brushes interact with paint already applied to the canvas. For example, Texture brushes can either cover or blend with the underlying image to create amazing effects.
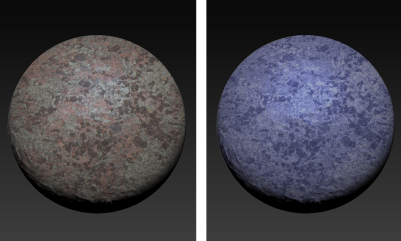
A 3D rendered model (left); a texture is blended into the image (right). Model by Mike Thompson.
Texture brushes can use the original texture color or mix the texture color with a different color. For example, if the texture that you want to use doesn't match the tone and color of your composition, you can sample a color from your painting and mix it with the texture color. You can choose an expression such as pressure, tilt, direction to vary the amount of color you mix into the texture. For more information, see Expression settings.
An example of a Texture brush that uses the original texture color (left); The original texture color is mixed with the selected color (right).
You can smudge a texture. Smudging reveals a little of the current texture as you push, pull, and smear pixels. You can choose a fixed amount of smudging or vary the effect with an expression. For example, if you link smudging to stylus pressure, light pressure will reveal more texture detail, increased pressure will reveal less detail.
An example of a Texture brush with smudging (left) and without smudging (right)
For even more astonishing results, you can use dab stencils to shape the dab and modify the opacity of Texture brushes. For information about dab stencils, see Dab Stencil controls.
Experiment with different brush settings to produce the effect you like. Texture brush settings are saved as part of a brush variant or applied to any active brush. For more information, see Adjusting brushes with brush controls.
After you customize a Texture brush variant, you can associate it with a texture and save it as a brush look for use in future projects. When you save a look, it is added to the Look Libraries panel. For more information, see Saving a brush look.
|
4
|
On the General panel (Window  Brush Control Panels General), choose one of the following methods from the Subcategory list box: Brush Control Panels General), choose one of the following methods from the Subcategory list box: |
|
• |
Texture — uses both the color and luminance information of the texture |
|
• |
Grainy Texture — works like Texture but also interacts with paper grain |
|
5
|
Click the Texture Brushes panel toggle button  on the extended property bar (Window Extended Property Bar). on the extended property bar (Window Extended Property Bar). |
|
6
|
In the Texture Brushes panel, perform a task from the following table. |
|
|
|
|
|
Move the Strength slider.
|
|
|
Enable the Source Blending check box.
|
|
|
Enable the Color Control check box. Enable one of the following options:
|

|
Current Color — lets you mix the original texture color with the selected color |
|
|
The Color Control option is not available for brushes that use the Texture Chroma or Grainy Texture Chroma methods. |
|
|
The Texture Color option is available only for brushes that use the Texture Luminance and Grainy Texture Luminance methods. |
|
|
|
Enable the Texture Smudging check box. Move the Amount slider to adjust the smudging amount.
|

When painting with brushes that use Source Blending, you may notice overlaps when you overlay brushstrokes. To paint without overlaps, in the Texture Brushes panel, disable the Source Blending option and set the texture Strength to 100%. In the Layers panel, add a new layer, and choose the Overlay method from the Composite Method list box. Move the Opacity slider to adjust the intensity of the brush marks. This workflow produces results that are very similar to Source Blending.
Copyright 2016 Corel Corporation. All rights reserved.


 .
.