
Quick links to procedures on this page:
• |
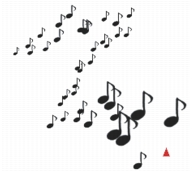
You can create your own brush dab shapes by creating a shape, selecting it, then capturing it as a dab.
This musical note was captured as a brush dab.
| To create a brush dab shape |
1 |
On a white background, draw a shape in black.
|
Use shades of gray to define the transparent areas of the dab. |
To follow stroke direction, a captured brush set must face toward the right side. |
2 |
Choose the Rectangular Selection tool |
3 |
Drag across your brush shape to create a square selection.
|
Corel Painter uses the selected area to set the brush size. When the brush is created, the selected area is sampled to compute each brush dab. |
If the original area requires scaling to the size of the brush dab, sampling can appear aliased. The greater the scaling, the more aliasing is apparent. To prevent too much aliasing from appearing, create a shape with soft (grayscale) edges that is close to the size you’ll be using. |
4 |
Click the Brush Selector on the Brush Selector bar.
|
5 |
In the Brush Library panel, choose the brush category in which you want to save
the variant for the captured dab shape.
|
6 |
Click Brush Library Options button |
7 |
If necessary, choose Window |
8 |
Draw with the brush on the canvas.
|
If you like the results you’ve captured, you can save the brush as a new variant. For information about how to save customized brushes for later use, see Creating, Restoring, and Deleting Brush Variants. |
You can paint with a captured brush just as you would with other brushes.
|
|
Copyright 2012 Corel Corporation. All rights reserved.