Quick links to procedures on this page:
• |
• |
• |
• |
• |
• |
• |
• |
The Focus commands in the Effects let you create sharpening, softening, motion blurring, and glass distortion effects.
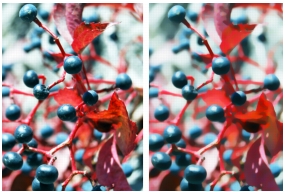
The Smart Blur effect softens the appearance of an image by smoothing out the colors and sharp details. The effect produces a result that is similar to applying soft brushstrokes. You can use Smart Blur to quickly apply a painterly effect to an image.
Before (left) and after (right) using Smart Blur.
| To apply Smart Blur |
1 |
Select a layer or area of the canvas.
|
If you want to apply the effect to the entire image, do not make a selection. |
2 |
Choose Effects |
3 |
In the Smart Blur dialog box, adjust the Amount slider.
|
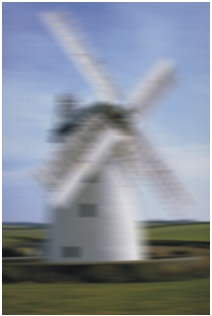
This effect creates a blur similar to what you’d get in a photograph by jostling the camera during a long exposure. It’s particularly effective with an image showing lights on a dark background.
Before (left) and after (right) using Camera Motion Blur.
| To apply Camera Motion Blur |
1 |
Select a layer or area of the canvas.
|
If you want to apply the effect to the entire image, do not make a selection. |
2 |
Choose Effects |
3 |
In the document window, drag to create the blur motion.
|
The direction and intensity of the blur is determined by your cursor movement. For example, fast movement produces a different blur than slow. A longer drag path increases the amount of blur. Straight, curved, and zigzag movements also produce different effects. |
4 |
In the Camera Motion Blur dialog box, adjust the Bias slider to move the origin of
motion along the drag path.
|
This effect creates a blur similar to the distance from the plane of camera focus in photography. Because you’re working in a 2D image, you can use the control medium to describe the distance of different pixels. The Depth of Field effect is a variable circle-of-confusion blur. You can specify the radius of the confusion circles for different regions of the image.
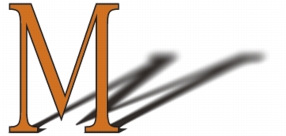
The “M” is a floating shape. The blur on the shadow was created by using Depth of Field.
| To apply Depth of Field |
1 |
Select a layer or area of the canvas.
|
If you want to apply the effect to the entire image, do not make a selection. |
2 |
Choose Effects |
3 |
In the Depth of Field dialog box, choose a source from the Using list box.
|
Darker regions of the source receive greater blur. |
4 |
Adjust the sliders to set the minimum and maximum radius of the blur regions.
|
The maximum size must be greater than the minimum size. |
This effect can take quite a while to process — especially with higher Min Size
and Max Size settings.
|
The Glass Distortion effect creates the kind of distortions you would see if you were looking at your image through a sheet of glass. You can make your image appear as if it is behind the pebble glass of a shower door, or you can distort your image beyond recognition.
Glass Distortion works by relocating the pixels of the image based on a displacement map. The map is created by combining displacement information from a source with a preset map type.
Before (left) and after (right) applying Glass Distortion.
There are five sources of displacement information:
• |
Paper uses the information in a paper texture to displace pixels. More displacement
is applied to light areas of the texture, and less to dark areas. Paper texture is good
for creating the pebbled glass effect. Unless you want frosted glass, you’ll probably
want to increase the scale of the paper.
|
• |
3D Brush Strokes uses the difference in luminance between the clone source and
the current document.
|
• |
Image Luminance uses the light and dark areas in the current document to
determine the intensity of distortions.
|
• |
Original Luminance uses the clone source’s luminance. Use a tessellation as the
clone source to produce a bumpy glass effect.
|
• |
[Alpha channel] or [Layer mask] uses the luminance of a channel or layer mask.
More distortion appears in the light areas of the channel. You must have a saved
alpha channel or layer mask to use this source.
|
An alpha channel or a layer mask is a good source to choose for a controlled distortion map. For example, gradations in the channel lead to a progressive distortion effect. Shapes in the channel produce distortions with distinct outlines. |
There are three types of maps:
• |
Refraction displaces pixels in the same way that an optical lens bends light. This is
the best map type for creating distortions that you’d expect from looking through
glass.
|
• |
Vector Displacement moves pixels in a specific direction.
|
• |
Angle Displacement moves pixels in different directions.
|
| To apply a Glass Distortion effect |
1 |
Select a layer or area of the canvas.
|
If you want to apply the effect to the entire image, do not make a selection. |
2 |
Choose Effects |
3 |
In the Glass Distortion dialog box, choose a source from the Using list box.
|
The amount of displacement depends on the value assigned to the image pixels from the Using source. |
If you want to work with an inversion of the selected source, enable the Inverted check box. |
4 |
Adjust the Softness slider to control the transitions between displaced colors.
|
Increasing the Softness setting creates more intermediate steps, which produces a smoother distortion. If you experience aliasing in a glass distortion, try increasing the Softness setting. |
5 |
Choose a map type from the Map list box.
|
6 |
Choose a quality type from the Quality list box.
|
7 |
Adjust the following sliders:
|
• |
Amount — controls the degree of displacement. Moving the slider to the right
increases the distortion.
|
• |
Variance — creates multiple variations in the neighborhood of the
displacement. The result of increasing variance depends on the type of image
and other settings.
|
• |
Direction — controls the direction of displacement. The 3 o’clock position
corresponds to 0°. The Refraction map type is not dependent on direction.
|
As you make changes, the Preview window shows their effects. |
This effect makes an image appear as if it has been blurred by movement.
The Motion Blur effect.
| To apply a Motion Blur effect |
1 |
Select a layer or area of the canvas.
|
If you want to apply the effect to the entire image, do not make a selection. |
2 |
Choose Effects |
In the Motion Blur dialog box, adjust the following sliders: |
• |
Radius — sets the amount of blur. Moving the slider to the right makes the
image look as though it’s moving faster.
|
• |
Angle — sets the direction in which the image appears to travel. A setting of 0°
blurs in the direction of 3 o’clock.
|
• |
Thinness — blurs the image in a direction perpendicular to the angle you
choose with the Angle slider.
|
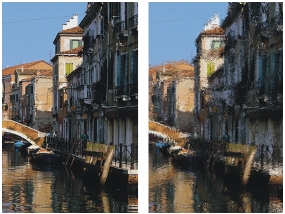
This effect heightens contrast by intensifying highlights and shadows. Sharper images are created by using either the Gaussian or Circular aperture options. Gaussian aperture sharpens the red, green, and blue components of color; Circular aperture sharpens an image based on luminance.
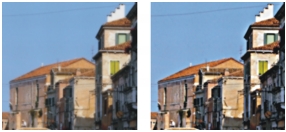
Before (left) and after (right) applying Sharpen.
| To sharpen focus |
1 |
Select a layer or area of the canvas.
|
If you want to apply the effect to the entire image, do not make a selection. |
2 |
Choose Effects |
3 |
In the Sharpen dialog box, enable an aperture option.
|
4 |
Use the following guidelines to adjust the sliders:
|
• |
Amount — determines how much of the edge of an element is affected
|
• |
Highlight — determines the intensity of the bright areas. Move the slider to the
right to brighten the highlights.
|
• |
Shadow — determines the depth of the shadows. The higher the percentage,
the darker the shadows.
|
If you have chosen the Gaussian aperture option and you want to sharpen only selected colors, enable any combination of the Red, Green, or Blue check boxes. |
The Soften effect increases the transition from one part of your image to another, enhancing the anti-aliasing of strokes. Images are softened using either the Gaussian or Circular aperture options. The Gaussian aperture is useful for creating smooth, optical blurs or defocusing; the Circular aperture is useful for creating shadow maps cast by a circular light source like the sun. The Super Soften effect is a stronger version of Soften.
| To soften focus |
1 |
Select a layer or area of the canvas.
|
If you want to apply the effect to the entire image, do not make a selection. |
2 |
Choose Effects |
3 |
In the Soften dialog box, enable an aperture option.
|
4 |
Adjust the Amount slider.
|
The farther the slider is to the right, the more steps there are between image elements, which creates more blurring. |
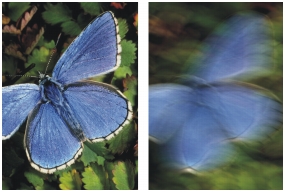
This effect creates a blur by zooming in on, or out from, an area. The greater the distance from the zoom point, the more the image is blurred. This effect lets you call attention to a particular area of the image.
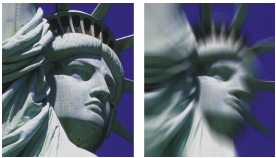
Before (left) and after (right) applying the Zoom Blur.
| To apply Zoom Blur |
1 |
Select a layer or area of the canvas.
|
If you want to apply the effect to the entire image, do not make a selection. |
2 |
Choose Effects |
3 |
In the document window, click the image to specify the zoom point.
|
4 |
In the Zoom Blur dialog box, adjust the Amount slider to determine the amount of
blur.
|
If you want to create the blur by zooming in, enable the Zoom In check box. If you want to create the blur by zooming out, disable the Zoom In check box. |
|
|
Copyright 2012 Corel Corporation. All rights reserved.