Creating masks
You can create a mask from an image by loading the image file from disk. When you use an image as a mask for another image, Corel PaintShop Pro applies the mask as a grayscale image. The source image is not altered. You can also create a mask by customizing one of the sample masks included with Corel PaintShop Pro.
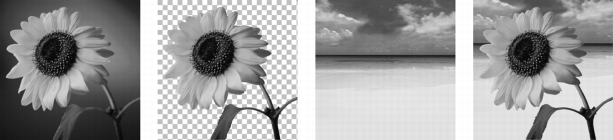
An example of an image used as a mask
You can use a selection to create a mask that shows or hides the selection. You can use this mask as a starting point for creating artistic effects.
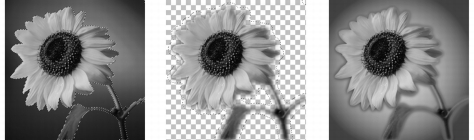
An example of a selection used as a mask
You can also create a mask from a channel by first splitting an image into its RGB, HSL, or CMYK channels. Corel PaintShop Pro creates a grayscale image for each channel. You can use one of these channel images to create a mask for the original image or for another image.
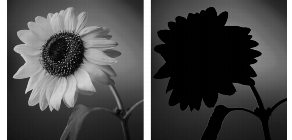
An example of the grayscale channel used as a mask
| To create a mask layer |
Edit workspace
1 |
On the Layers palette, choose the layer that you want to mask.
|
2 |
Choose Layers |
• |
Show All — shows all underlying pixels
|
• |
Hide All — hides all underlying pixels
|
You can paint on the image to show portions of the underlying
layer. For information about editing the mask, see Editing
masks.
|
For information about stacking layers, see Changing the order
of layers in an image.
|
| To create a mask from an image |
Edit workspace
1 |
Open the image that you want to use as a mask.
|
2 |
On the Layers palette, choose the layer that you want to mask.
|
3 |
Choose Layers |
4 |
Open the Source Window drop-list, and choose the image.
|
5 |
In the Create Mask From group box, choose one of the following
options:
|
• |
Source luminance — determines the degree of masking based
on the luminance value of the pixel color. Lighter colors produce
less masking; darker colors produce more masking. Transparent
areas completely mask the layer.
|
• |
Any non-zero value — applies masking without gradation. Pixels
with an opacity between 1 and 255 pixels become white;
transparent pixels become black. Transparent areas completely
mask the layer.
|
• |
Source opacity — determines the degree of masking based on
the opacity of the image. Fully opaque pixels produce no
masking; partially transparent pixels create more masking;
transparent pixels produce full masking.
|
If you want to reverse the transparency of the mask, mark the Invert mask data check box. |
6 |
Click OK.
|
The mask layer and the selected layer are added to a new layer
group. The mask layer applies to the selected layer only.
|
For information about editing a mask, see Editing masks.
|
To display the mask on the image, click the Highlight mask area
button |
To apply the mask layer to all underlying layers, drag it from the
layer group to the main level on the Layers palette.
|
| To create a mask from a selection |
Edit workspace
1 |
Make a selection on a layer by using the Selection tool |
2 |
Do one of the following:
|
• |
To mask the selection, choose Layers |
• |
To mask everything except the selection, choose Layers |
If you apply a mask layer to the background, the background is
automatically converted to a raster layer.
|
The mask layer and the selected layer are added to a new layer
group. The mask layer applies to the selected layer only.
|
For information about editing masks, see Editing masks.
|
| To create a mask from a channel |
Edit workspace
1 |
Choose Image |
• |
Split to RGB
|
• |
Split to HSL
|
• |
Split to CMYK
|
2 |
Select the grayscale image in which you want to create the mask.
|
3 |
Choose Layers |
4 |
In the Source Window drop-list, choose the channel that you
want to use for the mask.
|
5 |
In the Create Mask From group box, choose the Source luminance
option.
|
If you want to reverse the transparency of the mask data, mark the Invert mask data check box. |
6 |
Click OK.
|
The mask layer and the selected layer are added to a new layer group. The mask layer applies to the selected layer only. |
For information about editing the mask, see Editing masks.
|
For information about color channels, see Working with colors
and materials.
|