Printing images
Corel PaintShop Pro offers many ways to print images. You can print from the Manage workspace, Edit workspace, or Adjust workspace. You can use a template, or use a custom layout to meet specific size and layout requirements.
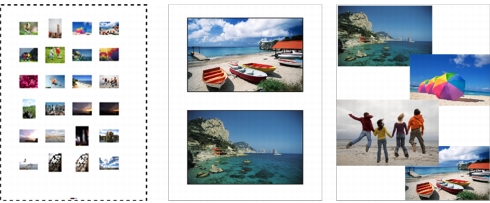
You can print contact sheets (left), print to standard photo sizes (center), or create custom print layouts (right).
Templates help you simplify image placement and sizing. You can use templates to lay out and print images in standard sizes, including 4 × 6 inches, 5 × 7 inches, and 10 × 15 centimeters. You can use a Corel PaintShop Pro template, or you can create your own custom template from a page layout that you create.
Creating your own layouts gives you the flexibility to print images to any size and lets you create a custom page for projects such as scrapbooks. For more information about creating layouts, see Creating layouts.
If you are preparing images for professional output, you can print an image to a file, which lets a service bureau send the file directly to an output device. If you are unsure about which settings to choose, consult the service bureau. You can also print crop and registration marks. Crop marks represent the size of the paper and print at the corners of the page. You can print crop marks to use as guides to trim the paper. Registration marks are required to line up film for proofing or printing plates on a color press. They print on each sheet of a color separation.
| To print the active image |
Edit workspace
1 |
Choose File |
2 |
In the Printer group box, click Printer.
|
The Print dialog box appears. |
3 |
Choose a printer from the Name drop-list, and click OK.
|
4 |
Click the Placement tab, and type or set a value in the Number of
copies control.
|
5 |
In the Orientation group box, choose one of the following
options:
|
• |
Portrait
|
• |
Landscape
|
6 |
In the Size and Position group box, set any of the following
controls:
|
• |
Width and Height — lets you specify width and height values to
set the image size
|
• |
Scale — lets you resize the image by entering a percentage
|
• |
Fit to page — fits the image to the printed page
|
• |
Center on page — centers the image on the printed page
|
• |
Upper left of page — positions the image in the upper-left
corner of the printed page
|
• |
Custom offset — lets you enter values in the Left offset and Top
offset boxes
|
7 |
Click the Options tab.
|
8 |
In the Print Output group box, choose one of the following
options:
|
• |
Color
|
• |
Greyscale
|
• |
CMYK separations
|
If you choose the CMYK separations option, you can print CMYK labels on each color plate or page by marking the CMYK plate labels check box in the Print Marks group box. |
9 |
Click Print.
|
You can script most print options; however, because of
variations in printer drivers, not all printer settings are
scriptable. For more information about scripting, see Scripting
basics.
|
For more information about printing options, see Creating
layouts.
|
| To print a contact sheet |
Manage workspace
1 |
In the Organizer palette, select the files that you want to print.
|
2 |
On the Organizer toolbar, click the Organizer menu button |
3 |
Specify the settings you want in the Print Contact Sheet dialog
box.
|
4 |
Click Print.
|
For more information about printing options, see
Understanding printing.
|
| To print to a file |
Edit workspace
1 |
Choose File |
2 |
Mark the Print to File check box.
|
3 |
Click Print.
|
4 |
Type a name in the Output File Name box.
|
| To print images by using a template |
1 |
In the Manage or Edit workspace, select thumbnails in the
Organizer palette.
|
2 |
Choose File |
The Print Layout window appears. |
3 |
Click File |
The Templates dialog box appears. |
4 |
In the Category group box, choose a category from the list.
|
Thumbnails of the templates in each category appear in the window on the right. Custom templates that you saved appear under the User Defined category. If the custom template was saved with images, the cells are filled with color. |
5 |
Select a template, and click OK.
|
If you previously saved images with the template, the images appear in the template cells and in the thumbnail list. Cells are grayed in the template thumbnail for templates with missing images. |
6 |
Drag images into the template cells.
|
If you want to fill the template with copies of the same image, click a thumbnail and click the Fill Template with Image button |
7 |
Click File |
For information about saving templates with links to images,
see Setting file locations.
|
You can remove an image from a template by selecting the
image and pressing Delete.
|
You can also open images by choosing File |
| To print crop and registration marks |
Edit workspace
1 |
Choose File |
2 |
In the Printer group box, click Printer.
|
The Print dialog box appears. |
3 |
Choose a printer from the Name list box, and click OK.
|
4 |
Click the Options tab.
|
5 |
In the Print Marks group box, mark one or more of the following
check boxes:
|
• |
Corner Crop Marks — prints crop marks at the corners of the
image
|
• |
Center Crop Marks — prints crop marks at the center of the
image edges
|
• |
Registration Marks — prints registration marks at the corners of
the image
|