Removing scratches
The Scratch Remover tool lets you remove scratches, cracks, and other unwanted image areas from photos.
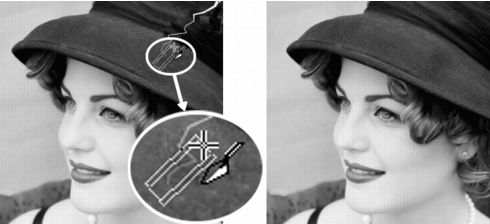
You can repair individual scratches by using the Scratch Remover tool.
You can use the tool to enclose the flawed area and fill it with the surrounding content that you want to keep. If the background is relatively smooth, the result is usually satisfying. Scratches on a textured or more complex background may be more effectively removed with the Clone Brush tool. For information about the Clone Brush tool, see Removing flaws and objects.
For images containing many small scratches, you can use the Automatic Small Scratch Remover command. For more information, see To remove scratches automatically.
| To remove scratches |
Edit workspace
1 |
On the Layers palette, select the layer that contains the area you
want to remove.
|
2 |
On the Tools toolbar, choose the Scratch Remover tool |
3 |
On the Tool Options palette, choose one of the following options
to define the shape of the Scratch Remover tool:
|
• |
square edge |
• |
beveled edge |
4 |
Position the pointer just outside the scratch on one end, hold
down the left mouse button, and drag to set a selection box over
the scratch.
|
5 |
Release the mouse button.
|
The enclosed area is replaced with the surrounding pixels. |
To avoid removing important details from areas surrounding
the scratch, you can limit the correction by creating a selection.
For information about creating selections, see Creating
selections.
|
If you are not satisfied with the result, click the Undo button
|
If the scratch extends over several different backgrounds, you
can try removing the scratch one section at a time.
|