
To sign in the Comments docker
To view, select, and move comments
To add a note associated with a comment
Using the Comments docker, you can view and address any comments added to a document in context, and you can provide in-context feedback.
To work with the Comments docker, you must first sign in. You can sign in with your G Suite or Office 365 enterprise account, and you can also sign is as a guest. When you sign in with an enterprise account, your comments are authenticated. When you sign in as guest, you can type the name you want to be associated with your comments. However, your comments cannot be authenticated. If you switch from commenting as guest to commenting with your enterprise account, all comments you made as a guest before will still be identified as guest ones.
After signing in, you can select, respond to, and resolve comments as well as reopen resolved comments. You can add a note icon, and then type a comment in the Comments docker, or you can mark up the document with arrows, rectangles, ellipses as well as straight and free-form lines. To draw attention to a specific area in a document, you can highlight it as if you were using a highlighter on paper. You can add a comment to clarify each markup you draw. If you want to add custom shapes and lines; you must set their properties, such as fill color, line thickness, and outline width, before you start drawing in the document. You can move any comment mark added to the drawing window; and you can resize arrows, shapes, and lines.
You can also co-author and co-edit text. For more information, see Collaborate on text.
| To sign in the Comments docker |
|
| 1 . | Click Window |
| The Sign-in page appears when you access the Comments docker for the first time. If you have already signed in but you want to switch accounts, click the Switch accounts button |
| 2 . | Perform a task from the following table. |
|
Click Sign in with G Suite, and provide the required credentials.
|
|
|
Click Sign in with Office 365, and provide the required credentials.
|
|
|
Click Continue As Guest. Type your email address and name.
|
| To view, select, and move comments |
|
| 1 . | Open a document that has comments and markup. |
| 2 . | Perform a task from the following table. |
|
Using the Pick tool
|
|
|
Using the Pick tool
Tip: You can also click the comment in the Comments docker.
|
|
|
Holding down Ctrl, click the comments in the Comments docker, or click the comment marks in the drawing window with the Pick tool.
Tip: You can also select multiple consecutive comments by holding down Shift and clicking the first and the last comment in the sequence in the Comments docker.
|
|
|
Using the Pick tool
|
| To respond to comments |
|
| 1 . | In CorelDRAW, click File |
| If the file is saved to another location, find it and open it from there. |
| 2 . | Click Window |
| 3 . | Perform a task from the following table. |
|
Click the Resolve button
Note: If you haven’t changed the default display settings for resolved comments, the comment mark and the comment disappear as soon as you resolve the comment. For information about showing and hiding resolved comments, see To hide and show comments.
Tip: You can also click the Actions button
|
|
|
Click the Options button
|
|
|
Click the Actions button
|
| To add a note associated with a comment |
|
| 1 . | In the Comments docker, click the Note tool |
| 2 . | Click where you want to add the note icon in the drawing window. |
| 3 . | Type a comment in the Comments docker, and press Enter. |
To add the same note on all document pages, you must first select the Master page in the Objects docker, and then click the Desktop layer.
You can cancel the comment you are typing by pressing Esc.
| To use drawing markup tools |
|
| 1 . | In the Comments docker, perform a task from the following table: |
|
Click the Arrow Markup tool
To draw a straight line, disable the Start arrow check box and the End arrow check box. Point to where you want to start the line, and drag to draw the line.
You can choose the color of arrows and lines from the Line color picker before you start drawing.
You can specify the width of arrows and lines by typing a value in the Line width box before you start drawing.
|
|
|
Click the Highlighter tool
You can choose the color of highlights from the Highlight color picker before you start drawing.
You can specify the width of highlights in the Highlight width box before you start drawing.
|
|
|
Click the Freehand Markup tool
You can choose the color of lines from the Line color picker before you start drawing.
You can specify the width of lines in the Line width box before you start drawing.
|
|
|
Click the Rectangle Markup tool
You can choose the color of the outline from the Outline color picker before you start drawing.
You can specify the width of the outline in the Outline width box before you start drawing.
|
|
|
Click the Ellipse Markup tool
You can choose the color of the outline from the Outline color picker before you start drawing.
You can specify the width of the outline in the Outline width box before you start drawing.
|
|
|
Select the Rectangle Markup tool
|
| 2 . | Type a comment in the Comments docker, and press Enter. |

50% transparency is applied to the colors of the markup.
| To resize comment marks |
|
| 1 . | Using the Pick tool |
| 2 . | Drag a selection handle. |
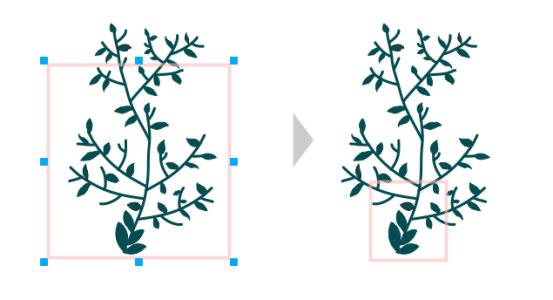
The rectangle was resized to focus on a specific area of the design.
| To edit your comments |
|
| 1 . | In the Comments docker, click a comment that you have added, click the Actions button |
| 2 . | Edit the comment, and press Enter. |
You can edit only your own comments.
| To undo and redo actions related to comments |
|
| • | In the Comments docker, perform a task from the following table. |
|
Click the Undo button
|
|
|
Click the Redo button
|
| To hide and show comments |
|
| 1 . | Click the Pick tool |
| 2 . | In the Comments docker, click the Options button |
|
Click Show Annotations to disable or enable the command.
|
|
|
Click Show Resolved to disable or enable the command.
|
| To delete comments |
|
| • | In the Comments docker, perform a task from the following table. |
|
Click the comment, and press Delete.
Tip: You can also click the Actions button
|
|
|
Click the Options button
|
To delete a comment, you can also select the comment mark in the drawing window by using the Pick tool ![]() , and press Delete.
, and press Delete.
| To save and share a file |
|
| 1 . | In the Comments docker, click the Save and share button |
| 2 . | In the dialog box that appears, type a file name. |
| 3 . | Click one of the following buttons: |
| • | Save — saves the file and uploads it to Corel Cloud |
| • | Save and Share — saves the file, uploads it to Corel Cloud, and opens it in CorelDRAW.app so that you can share it with others |
![]()
The features documented in the Help are available in the full version of CorelDRAW Graphics Suite 2020. Some features may not be available in this version of the product.