Add hotspots to callouts
If your drawings are used in interactive electronic technical manuals (IETMs), you can make those files even more information-rich. Corel DESIGNER lets you add hotspots to callout shapes so that your exported CGM v4 file can be responsive when you click or hover over them.
You can add hotspots automatically by using the Create CGM Hotspot feature, or manually by using the Object Data docker. By default, automatic hotspots have the following data — name, apsid, and region. However, you can add to or edit the default object data from the Options dialog box (Tools ![]() Options
Options ![]() Tools). You can display data fields relevant for specific CGM Version 4 profiles, such as ActiveCGM, WebCGM, ATA GREX, and S1000D; and you can display all available data fields for CGM Version 4. After editing default object data, you can undo your changes by reverting to the factory default values or to the last custom default object data values.
Tools). You can display data fields relevant for specific CGM Version 4 profiles, such as ActiveCGM, WebCGM, ATA GREX, and S1000D; and you can display all available data fields for CGM Version 4. After editing default object data, you can undo your changes by reverting to the factory default values or to the last custom default object data values.
Working in the Object Data docker, you can add a hotspot to a callout shape manually. You can link a callout shape to a web page, jump to a section in another file specific to the callout shape, or display a screentip. For example, you can link a part in a design to an online parts catalog, allowing for instant access to specific, up-to-date information, such as price and availability.
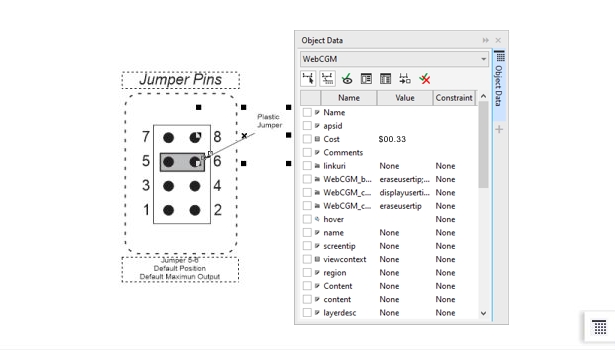
You can add hotspots to callout shapes.
To add a hotspot to a callout automatically
To add a CGM hotspot to an existing callout shape, right-click it, and click Create CGM Hotspot.
To edit the default object data values for automatic hotspots
The object data for automatic hotspots in the Options dialog box is always synced with the object data values in the Object Data docker. You can edit the object data values for automatic hotspots in the Object Data docker as well. However, to include or exclude object properties, you must use the Options dialog box.
For more information about editing object data, see To add or edit data for an object.
To add a hotspot to a callout manually
For more information about applying CGM data to objects, see Apply CGM data to objects.