Draw lines
You can draw many different kinds of lines, including straight lines, curved lines, lines that contain both straight and curved segments, and straight lines that are perpendicular or tangent to objects. In addition, you can draw straight or curved segments and then add one node at a time. You can also draw curved segments by specifying the width and height.
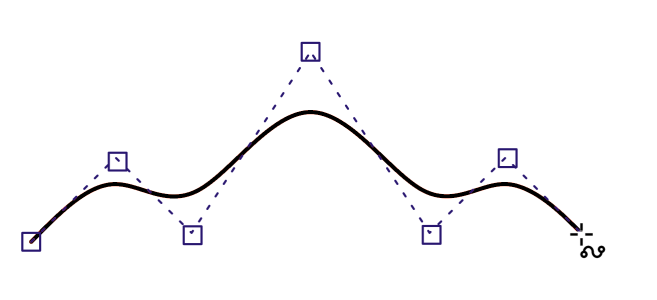
By using control points, you can easily shape a curved line and draw B-splines, which are typically smooth, continuous curved lines. B-splines touch the first and last control points and are pulled by the points in between. However, unlike the nodes on Bézier curves, control points don’t let you specify the points through which a curve passes when you want to align a curve with other drawing elements.
The control points that touch the line are referred to as "clamped". Clamped control points function as anchors. The control points that pull the line but do not touch it are referred to as "floating". The first and last control points are always clamped on open‑ended B-splines. The points in between float by default, but you can clamp points if you want to create cusps or straight lines within the B-spline. You can edit completed B-splines by using the control points.
The path of a B-spline curve is determined by the control points you set.
Some lines have nodes and control points that you can manipulate to shape the lines as you draw. For information about node types, see Node types.
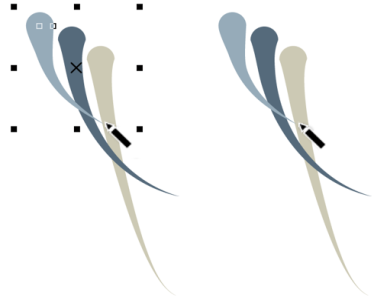
Corel DESIGNER provides preset lines that let you create thick strokes in a variety of shapes. After you draw a preset line, you can apply a fill to it. For information about applying fills, see Fills.
When drawing lines using the curve tools, you can hide the bounding box that displays around the lines once they are drawn. The curve tools include: the Linear Pattern tools, the Freehand tool, the 2-point line tool, the Bézier curve tool, the Pen tool, the Multi-point line tool, the B-spline tool, and the 3-point curve tool.
You can hide the bounding box to enhance the fluidity of drawing lines in quick succession.
To draw a straight line

1
Click the
2-point line tool

.
2
Point to where you want to start the line, and drag to draw the line.
As you drag, the length and angle of the segment appear in the status bar.
|
|
|
Draw a line by using the Multi-point line tool |
Click the Multi-point line tool  . Click where you want to start the line, and click where you want to end the first line segment. Click to add additional segments. Double-click to end the line. |
Draw a line by using the Pen tool |
Click the Pen tool  . Click where you want to start the line segment, and click where you want to end the first line segment. Click to add additional segments. Double-click to end the line. |
Add a line segment to a selected line |
With the 2-point line tool, point to the end node of a selected line, and drag to draw the line. |

To reposition a line while drawing, hold down both the left and right mouse buttons, and drag the line to a new position. This feature is available for the following curve tools: Freehand, Multi-point line, and 2-point.
You can use snapping to specify the start points and endpoints of lines. For information, see Work with precision.
To draw a perpendicular line
1
Click the
2-point line tool
.
2
On the property bar, click the
Perpendicular 2-point line button

.
3
Click the edge of an object, and drag to where you want the line to end.
If you want to draw a line that is perpendicular to two objects, drag to the edge of the second object, and release the mouse button when the perpendicular snap point appears.
To extend the line beyond the second object, hold down
Ctrl when the perpendicular snap point appears, and drag to where you want the line to end.
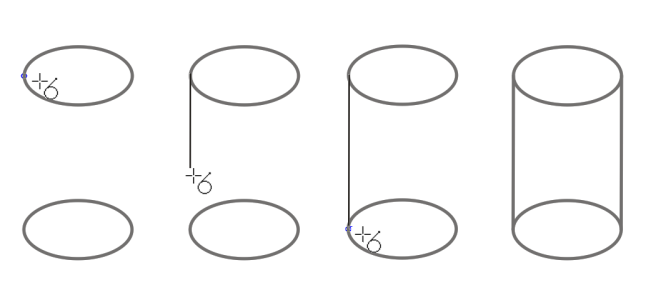
Drawing a perpendicular line

This procedure cannot be used for drawing a line that is perpendicular to the baseline of a text object.
You can also drag from an existing curve to draw a perpendicular line.
To draw a tangent line
1
Click the
2-point line tool
.
2
On the property bar, click the
Tangential 2-point line button

.
3
Click the edge of a curved segment in an object, and drag to where you want the tangent line to end.
If you want to draw a line that is tangent to two objects, drag to the edge of the second object, and release the mouse button when the tangent snap point appears. When the quadrant snap point coincides with tangent snap point, the quadrant snap point appears.
To extend the line beyond the second object, hold down
Ctrl when the tangent snap point appears, and drag to where you want the line to end.
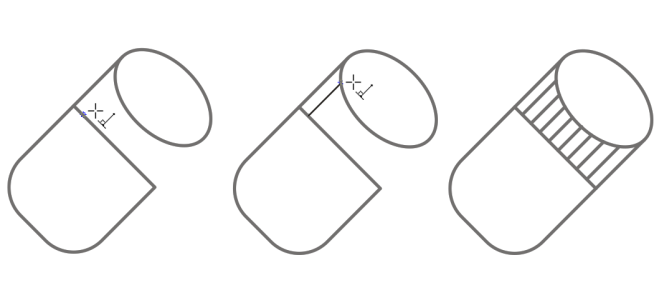
Drawing tangent lines
The Tangential 2-point line mode can be used for drawing the sides of the cylinder.
To draw a curved line
1
Click the
Freehand tool

.
2
Point to where you want to start the
curve, and drag to draw the line.
|
|
|
Draw a curved line by using the Multi-point line tool |
Click the Multi-point line tool . Point to where you want to start the curve, and drag across the drawing page. Double-click to finish the curve. |
Draw a curved line by using the Bézier curve tool |
Click the Bézier curve tool  . Click where you want to place the first node, and drag the control point in the direction you want the curve to bend. Release the mouse button. Point to where you want to place the next node, and drag the control point to create the curve you want. Double-click to finish the curve. The length of the line appears in the status bar as you drag. |
Draw a curved line by using the Pen tool |
Click the Pen tool . Click where you want to place the first node, and drag the control handle to where you want to place the next node. Release the mouse button, and drag the control handle to create the curve you want. Double-click to finish the curve. |
You can erase a portion of a freehand curve by holding down Shift and dragging backward over the line before releasing the mouse button.
To reposition a line while drawing, hold down both the left and right mouse buttons, and drag the line to a new position. This feature is available for the following curve tools: Freehand, Multi-point line, and 2-point.
You can close an open curve object by clicking Object  Join Curves. The distance between the endpoints of the open curve should not exceed the Gap tolerance value in the Join Curves docker.
To draw a curved line by specifying width and height
1
Click the
3-point curve tool

.
2
Click where you want to start the
curve, and drag to where you want the curve to end.
The start and end positions appear in the status bar.
3
Release the mouse button, and click where you want the apex of the curve to be.
As you position the apex, the length of the segment appears in the status bar.
To reposition a curved line while drawing, hold down both the left and right mouse buttons, and drag the line to a new position.
To draw a B-spline
1
Click the
B-spline tool

.
2
Click where you want to start the line.
3
Click to set as many control points as you need to shape your line.
Control points float by default, but you can clamp control points to the line by pressing
V while clicking.
4
Double-click to finish the line.
Pressing
Esc cancels the line instead of finishing it.
|
|
|
Reshape the line by using control points |
Select the line using the Shape tool  , and reposition the control points to reshape the line. |
|
|
Select the line using the Shape tool , click a clamped control point, and click the Float control point button  on the property bar. |
|
|
Select the line using the Shape tool , click a floating control point, and click the Clamp control point button  on the property bar. |
|
|
Select the line using the Shape tool , and double-click along a control line. |
|
|
Select the line using the Shape tool , and double-click the control point that you want to delete. |
Select multiple control points |
Select the line using the Shape tool , and hold down Shift while you click the control points that you want to select. |
If you add to a B-spline by selecting the first or last control point, the clamped control point automatically changes to a floating control point as you draw the new portion of the line.
You can change whether a control point is floating or clamped by holding down V and clicking a control point with the Shape tool.
You can also add control points while you draw a B-spline by pressing Spacebar instead of clicking.
By choosing Object Convert to curves, you can convert a B-spline line to curves and then reshape it by using nodes. After a line has been converted, you can no longer edit it by using B-spline control points.
To draw a preset line
1
Click the
Linear pattern preset tool

.
2
Choose a preset line shape from the
Preset stroke list box.
3
Drag until the line is the shape you want.
If you want to adjust the line width, type a value in the
Stroke width box on the property bar.
To hide the bounding box when using curve or linear pattern tools
1
In the toolbox, click one of the following tools:
2
Click the
Bounding box button

on the property bar.
When you hide the bounding box while working with one curve tool, the bounding box remains hidden for all curve tools. For example, if you hide the bounding box when using the Freehand tool, it remains hidden when you switch to the Bézier curve tool.
You can also hide the bounding box when drawing with the curve tools by clicking Tools Options Corel DESIGNER. Click Display, and enable the Hide bounding box for curve tools check box.