Trim objects
Trimming creates irregularly shaped objects by removing object areas that overlap. You can trim almost any object, including clones, objects on different layers, and single objects with intersecting lines. However, you cannot trim paragraph text, dimension lines, or masters of clones.
Before you trim objects, you must decide which object you want to trim (the target object) and which object you want to use to perform the trimming (the source object). For example, if you want to create a star-shaped cut out of a square object, the star is the source object because you are using it to trim the square. The square is the target object because it’s the object you want to trim. The source object trims the part of the target object it overlaps.
The target object retains its fill and outline attributes. For example, if you trim a rectangle that is overlapped by a circle, the area of the rectangle that was covered by the circle is removed, creating an irregular shape.
Corel DESIGNER lets you trim objects in different ways. You can use a front object as the source object to trim an object behind it, as well as use the back object to trim a front object. You can also remove hidden areas of overlapping objects, so that only the visible areas remain in the drawing. Removing the hidden areas can reduce file size when you convert vector graphics to bitmaps.
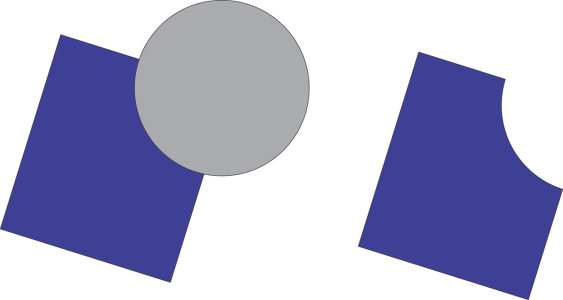
The circle is used to trim the rectangle.
To trim an object
If you want to delete objects during the trim, enable the Delete selected object or Delete target object check box in the Shape docker.
To trim front or back objects
You can trim the control object of a PowerClip object so that the object inside the PowerClip object will assume the new shape of the PowerClip container. For information about PowerClip objects, see PowerClip objects.
Linked objects such as drop shadows, text on a path, blends, contours, and extrusions are converted to curve objects before they are trimmed.
To trim overlapping areas in objects
You can trim the control object of a PowerClip object, so that the object inside the PowerClip object assumes the new shape.
Linked objects, such as drop shadows, text on a path, blends, contours, and extrusions, are converted to curve objects before they are trimmed.