Crop images
You can crop an image to remove unwanted areas and improve its composition. You can select a rectangular area that you want to keep, and then you can discard the rest. As a result, you reduce the file size of an image without affecting its resolution.
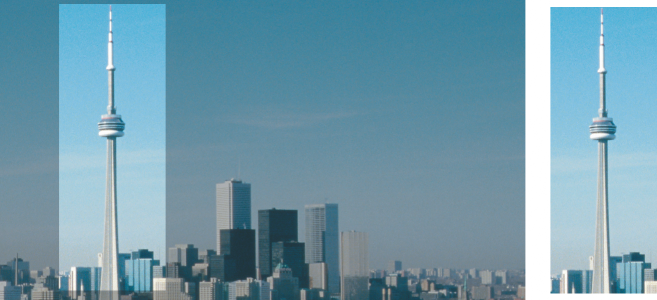
Cropping lets you remove unwanted image areas.
You can also easily crop a single-color border surrounding an image, such as a white edge surrounding an old photograph.
Corel PHOTO-PAINT also lets you crop around the editable area of a mask; however, the resulting image is always rectangular. For information about masks, see Masks.
You can also change the size of an image without removing or adding image areas by changing the image dimensions and resolution. For more information, see Image dimensions, resolution, and paper size.
To crop an image

1
Click the
Crop tool

.
2
Drag to select an area on the image.
3
Double-click inside the cropping area.
|
|
|
Enlarge or reduce the cropping area |
Drag the cropping handles. |
|
|
Click and drag inside the cropping area to reposition it. |
Rotate the cropping area to straighten it |
Click inside the cropping area to display the rotation handles  . Drag the rotation handles to align the cropping area with the image area you want to crop. |
Expand the cropping area outside the original image |
Click Image  Crop Expand cropping area Crop Expand cropping area, and drag a cropping handle outside the image. |
Change the resolution of the cropping area |
Choose a value from the Crop resolution list box on the property bar. This setting lets you set a new resolution for the cropped image. For example, you can crop a high-quality photo to the size you want and change the resolution to 96 dpi so that the cropped photo is ready for web use. |
Change the orientation of the cropping area |
Click the Change orientation button  on the property bar. |

You can hide the crop overlay to view the image you are cropping more clearly by clicking Image Crop Crop overlay.
You can also crop an image area by clicking the Crop tool and typing values in the Size and Position boxes on the property bar.
To crop a border color from an image
1
Click
Image Crop Crop border color.
2
Enable one of the following options:
•
Background — crops the color specified in the
Secondary color swatch

in the color control area of the toolbox
•
Foreground — crops the color specified in the
Main color swatch

in the color control area of the toolbox
•
Other — crops the color you choose using the color picker or the
Eyedropper tool

3
In the
Tolerance area, enable one of the following options:
•
HSB mode — determines the color tolerance based on the similarity of hue, saturation, and brightness levels between adjacent pixels
4
Move the
Tolerance slider to set the tolerance for the color that you want to crop.
You may need to experiment with different
Tolerance slider positions to successfully remove the border color.
To crop to an editable area of a mask
2
Click
Image Crop Crop Image to mask.

For more information about defining editable areas, see Define editable areas.