Define editable areas
There are a number of ways to define an editable area in an image without using color information from the image.
Rectangular or elliptical editable areas
You can define rectangular or elliptical editable areas in an image.

A circular area defined with the Ellipse mask tool
Editable areas defined by using text, objects, or the Clipboard contents
You can define an editable area by using objects. When you create an editable area that has the shape of one or more objects, you have to move the objects away from the editable area before editing it.
You can define an editable area by using text. The editable area created when you type has the font and style characteristics you specify. You can also create an editable area from existing text.
You can define an editable area by pasting information from the Clipboard into the image window as an editable area. The area you create is a floating editable area, which you can edit and move without changing the underlying image pixels.
Editable areas defined by using the Freehand Mask tool
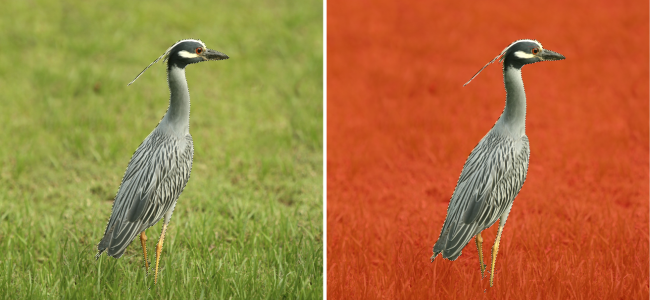
You can define an editable area by outlining the image area with the Freehand mask tool as you would with a pencil and paper, or by clicking at different points on the image to anchor straight line segments.
You can also define an editable area by painting over it with a brush.
Editable areas defined by using the Planar Mask tool
The Planar mask tool lets you define a feathered editable area along parallel lines. The lines can be moved or rotated to adjust the position and degree of the effect that is applied to the mask.
In combination with a blur effect, such as the Bokeh Blur, the Planar mask tool is useful for setting the depth of field in a photo along a linear area of focus such as a road, a bridge, or another linear element, while blurring the areas outside the lines. For more information about the Bokeh Blur effect, see Bokeh Blur effect.
You can define a border-shaped editable area from the edges of an existing editable area to frame parts of an image with a color, texture, or special effect. A new mask marquee is placed on either side of an existing mask marquee to define a border-shaped editable area.
Editable areas based on the edge of a shape or area
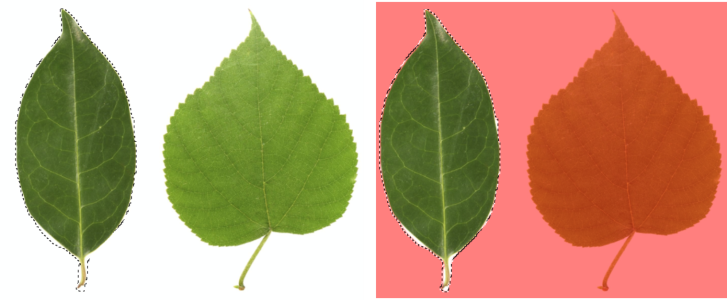
You can define an editable area based on the edge of a shape or area by painting with the Smart Selection Mask tool. The selection strokes that you apply expand to the outer edges of the area that you painted. You can also detect the edges of a shape or area within selections created with any mask tool.
Editable areas consisting of the entire image
You can also define the entire image as an editable area. This feature is very useful when you want to apply a special effect requiring a mask to the entire image. For information about special effects, see Apply special effects.
Editable areas defined by using a clip mask
You can also define an editable area using an existing clip mask.
To define a rectangular or elliptical editable area
Using the Normal mask style, you can define a square or circular editable area by holding down Ctrl after you begin to drag in the image window.
Using the Normal mask style, you can define an editable area from its center by holding down Shift after you begin to drag in the image window.
To define an editable area by using text, objects, or the Clipboard contents
You can also click the Create mask button on the Mask/object toolbar to define an editable area with one or more selected objects. If the Mask/object toolbar is not displayed, click Window ![]() Toolbars
Toolbars ![]() Mask/object.
Mask/object.
To define an editable area by using the Freehand Mask tool
You can also define an editable area by dragging the Freehand mask tool in the image window and double-clicking to complete the outline.
An editable area created with the Freehand mask tool
To define an editable area by using the Planar Mask tool
You can adjust the editable area and the feathered area by dragging the interactive onscreen handles. You can also rotate the editable area by dragging a rotation handle.
You can use different mask modes with the Planar mask tool. For more information about mask modes, see Expand and contract editable areas.
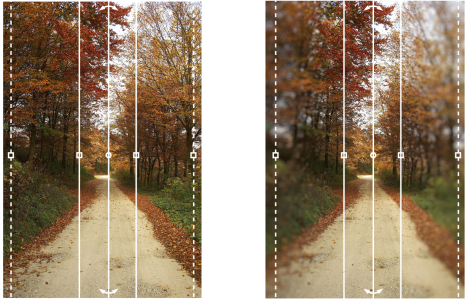
Example of a planar mask in combination with a blur effect
To define an editable area by painting
You can change the size of the brush nib of the Brush mask tool by holding down Alt and dragging in the image window until the nib is the size you want.
You can apply a straight brushstroke with the Brush mask tool by holding down Ctrl after you begin to drag in the image window. While still holding down Ctrl, you can press and release Shift to switch between horizontal and vertical brushstrokes.
To define a border-shaped editable area
A soft edge produces a more gradual blend with the background image than a hard edge does.
To define an editable area based on the edge of a shape or area
You can use any mask tool to define an editable area based on the edge of a shape or area. After defining an editable area, click Mask ![]() Apply Smart Selection to Mask.
Apply Smart Selection to Mask.
By default, anti-aliasing is turned on to prevent jagged edges in the editable area. To turn off anti-aliasing, click the Anti-aliasing button ![]() on the property bar.
on the property bar.
You can feather the edges of the editable area by clicking the Feather mask button ![]() on the property bar and specifying settings in the Feather dialog box. For more information about feathering editable areas, see To feather the edges of an editable area.
on the property bar and specifying settings in the Feather dialog box. For more information about feathering editable areas, see To feather the edges of an editable area.
An editable area based on the edge of a shape created with the Smart Selection Mask tool
To define the entire image as an editable area
If the mask overlay is enabled, the mask marquee does not appear.