|
Working with print batches |
  
|
|
Working with print batches |
|
Controlling print jobs and page breaks
When a print layout contains more than one image on a page, such as a contact sheet, it is important to understand when printing will begin and how to control the page breaks. These operations are controlled by the Continuous Printing check box on the Print Settings panel.
When Continuous Printing is enabled, Corel AfterShot Pro begins to process a print job as soon as enough images have been added to the print batch to fill a single page. As additional images are added to the batch, more pages are processed and sent to the printer (as pages fill up). If the page layout contains only one image, the images are sent to the printer immediately. If the print layout has multiple images on a single page, then the last page may not be auto-sent to the printer — it waits for the page to be filled. In order to print a partial page, you must open the Print Settings window and click Print in the lower right corner.
In Continuous Printing mode, to avoid wasting paper and ink, it is important to configure and confirm the following settings: Printer, Page Settings, Additional Image Settings, DPI, and Layout. This mode allows you to process a continuous stream of images as soon as they are added to a print batch. This is very useful for high-volume printing situations.
When Continuous Printing is not enabled, Corel AfterShot Pro queues all the images you send to the batch and does begin printing until you open the Print Settings window and click Print in the lower-right corner. This allows you to slowly choose all the images you want to print, review the pages to be printed, remove images or add additional images until you are satisfied with the image selection and print layout. When you are ready to send the images to the printer, click Print in the lower-right corner of the Print Settings window. This opens a dialog box with Printer Settings specific to the selected printer. This is where you set options like paper type, print quality, and printer color management options.
When you click Print and accept the settings in the Printer Driver window, all the images that are listed in the Print Settings window are processed and printed, including partial pages. If you add more images to the print batch, the new images do no print automatically; they remain queued until you click Print again.
This mode allows you to process batches of images together and includes a page break at the end of each batch with more than one image on a page.
To send versions to a printing batch
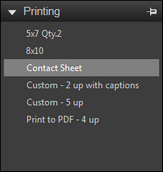
| 2. | Click the Output tab and do one of the following: |
| • | Drag the thumbnails to a batch name in the Printing section. |
| • | Double-click a batch name in the Printing section, set the options you want in Print Settings dialog box, and then drag the selected thumbnails to the dialog box. |
| • | If there is a shortcut key assigned to the batch you want to use (if set, shortcut keys appear to the left of the batch name), press the shortcut key. |
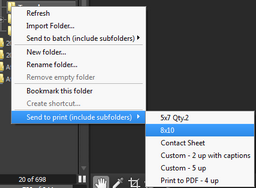
You can also print all the images in a folder that you select in the Browse panel (from the File System or Library).
To send a folder of images to a printing batch
| 1. | In the Browse panel, right-click the folder you want to batch. |
| 2. | Select Send to print from the context menu, then the select name of the batch you want to use. |
© 2013 Corel Corporation