Quick links to procedures on this page:
• |
• |
• |
• |
| Premium feature |
In CorelDRAW, you can apply several new special effects to bitmaps, including artistic effects; camera effects for adjusting the color and tone of photos; and texture effects for creating stone, plastic, relief sculpture, and other textures. While applying an effect, you can zoom by using the mouse wheel, or pan by dragging the image.
For more information, see Applying special effects in bitmaps.

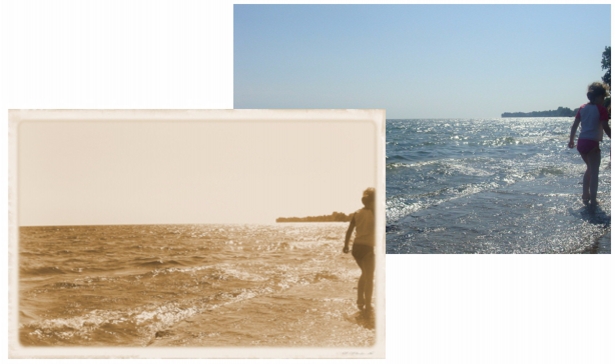
The Time machine effect recreates photographic styles from the past.
The new special effects are
• |
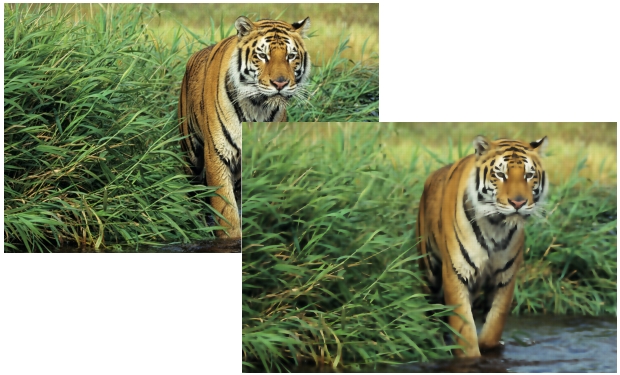
Smart blur — blurs an image but retains the edge detail. This effect is useful if
you want to retain the sharp lines and edges, such as the ones that form the letters
in text, when you export an image to a file format that would normally reduce the
amount of detail. This effect is ideal for removing noise and artifacts from JPEG
images or removing wrinkles from photos.
|
• |
Colorize — lets you replace all colors in an image with a single color (or hue) to
create a duotone image. You can then adjust the saturation or vividness of the color.
A color with 100% saturation contains no white. A color with 0% saturation
corresponds to a shade of gray. With this effect, you can create various single-color
images. For example, a brownish hue can create a sepia effect, simulating the color
of old photographs.
|
• |
Photo filter — lets you simulate the effect of placing a colored filter in front of a
camera lens. You can choose the color of the filter and then adjust the color density
and luminosity.
|
• |
Sepia toning — simulates the look created when you take a photo with sepia film.
Sepia-toned images are similar to black-and-white photos (also known as grayscale
photos), except the tones are brown instead of gray.
|
• |
Time machine — lets you walk your image back through history to recreate some
popular photographic styles from the past. You can choose from seven styles, which
range from the year 1839 to the 1960s.
|
• |
Alchemy — transforms images into artistic media paintings by applying
brushstrokes to images. You can create a brush and specify color, size, angle, and
transparency settings. You can also choose from a variety of preset brushes, and
save customized brushes.
|
• |
Bump-map — adds texture and patterns to an image by embedding its surface
with a relief based on the pixel values of a bump map image. The pixel values of the
bump map image represent surface elevation. You can use a preset bump map or
load a custom bump map image. You can specify the surface and lighting
properties of the effect.
|
• |
Cobblestone — makes an image look as though it was created with cobblestones.
You can specify the size, spacing, and granularity of the cobblestones.
|
• |
Elephant skin — gives an image a wrinkled look by creating an overlay of wavy
lines. You can specify the age of the elephant skin (up to 100 years) as well as the
skin color.
|
• |
Etching — transforms an image into an etching. You can control the depth of the
etching, the amount of detail, the direction of the light, and the color of the metal
surface.
|
• |
Plastic — makes an image look as though it is made of plastic. You can specify the
image depth, as well as the color and angle of the light shining on the plastic.
|
• |
Relief sculpture — transforms an image into a relief sculpture. You can set the
smoothness of the relief, the amount of detail it contains, the direction of the light,
and the surface color.
|
• |
Stone — gives an image a stone texture. You can specify the amount of detail, the
density of the pattern, and the angle of the light hitting an image. You can apply a
preset stone style or create and save a custom stone style as a preset.
|
| To apply the Smart Blur effect |
1. |
Click Bitmaps |
2. |
In the Smart blur dialog box, move the Amount slider.
|
| To apply camera effects |
1. |
Click Bitmaps |
• |
Colorize
|
• |
Photo filter
|
• |
Sepia toning
|
• |
Time machine
|
2. |
In the dialog box, specify the settings you want.
|
| To apply custom effects |
1. |
Click Bitmaps |
• |
Alchemy
|
• |
Bump-map
|
2. |
In the dialog box, specify the settings you want.
|
| To apply texture effects |
1. |
Click Bitmap |
• |
Cobblestone
|
• |
Elephant skin
|
• |
Etching
|
• |
Plastic
|
• |
Relief sculpture
|
• |
Stone
|
2. |
In the dialog box, specify the settings you want.
|

The Smart blur effect smooths the surfaces while keeping the edges sharp.

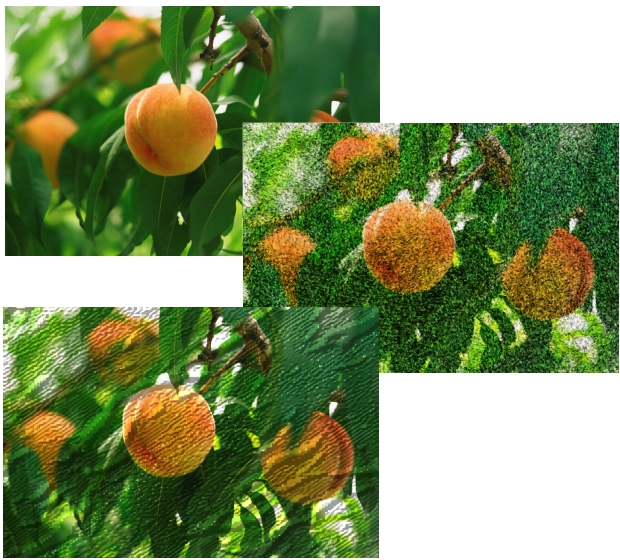
Original (top), Alchemy effect (middle), and Bump-map effect (bottom)
|
|
Copyright 2012 Corel Corporation. All rights reserved.