Quick links to procedures on this page:
• |
• |
• |
• |
• |
A rollover is an interactive image that changes in appearance when you click or point to it. For example, you can make a button change color when it is clicked, or display text when you point to it. Rollovers are frequently used on Web pages as navigation buttons.
Rollovers are made by using objects, such as shapes, brushstrokes and text. You can use a single object or a group of objects, such as an ellipse with text on it. Rollovers consist of the following states:
• |
Normal — displays the default state
|
• |
Over — is triggered when you point to it
|
• |
Down — is triggered when you click it
|
Each state consists of an object or multiple objects.
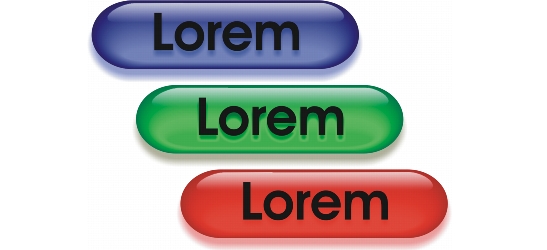
The three states of a rollover: normal, over, and down
You can edit rollover states by adding, modifying and removing objects in each state. When you create a rollover, the original objects are copied to the normal, over, and down states. Adding an object to a rollover state adds the object to all states. However, any changes you make to an object are applied only to the current state. You can also remove objects from the current state.
If you want to create a rollover by using an editable area or the background, they must first be converted to objects. For more information about defining editable areas, see Working with masks.
When you create a rollover, the image is sliced, and the rollover becomes a slice. For more information on working with image slices, and exporting and optimizing sliced images, see Slicing images.
| To create a rollover |
1 |
Click Window |
2 |
Select an object.
|
3 |
In the Rollovers docker, click the Create rollover from object button |
4 |
Choose one of the following rollover states from the States list box:
|
• |
Normal
|
• |
Over
|
• |
Down
|
5 |
Edit the selected rollover state by adding, removing, and modifying objects.
|
6 |
Click the Finish rollover button |
Each state retains its component objects, so you can continue to edit the rollover. |
|
You can also
|
|
|---|---|
|
Delete a rollover
|
In the Rollover docker, click the Delete rollover button
|
|
Modify an existing rollover
|
In the Rollover docker, click the Edit rollover button
|
In the Objects docker, rollover objects are highlighted, grouped, and have a
Rollover object icon |
In the Objects docker, the Rollover object icon turns red when a rollover
overlaps another rollover. Overlapping rollovers cannot be exported. You must
move the rollover so it no longer overlaps with another rollover object.
|
You can select a single object to start, and then add other objects to it to
change the appearance of the rollover.
|
| To edit a rollover |
1 |
In the Objects docker, select a rollover.
|
Rollovers have Rollover object icons |
2 |
Click Web |
3 |
In the Rollover docker, choose one of the following rollover states from the States
list box:
|
• |
Normal
|
• |
Over
|
• |
Down
|
4 |
Edit the rollover state by adding, removing, and modifying objects.
|
5 |
Click Web |
When you extract a rollover to simple objects, the component objects are
named automatically.
|
It is not possible to edit two rollovers at the same time.
|
You can edit a rollover by double-clicking it in the image window.
|
You can also edit a rollover by clicking the Edit rollover button |
| To add an object to a rollover |
1 |
In the Rollover docker, choose one of the following rollover states from the States
list box:
|
• |
Normal
|
• |
Over
|
• |
Down
|
2 |
In the toolbox, click a shape tool.
|
3 |
Drag in the image window to create a shape.
|
The object is added to all rollover states. |
|
You can also
|
|
|---|---|
|
Add brushstrokes
|
In the toolbox, click the Paint tool
|
|
Add text
|
Click the Text tool
|
For more information about adding shapes and brushstrokes, see Working
with objects. For more information about adding text, see Creating and
formatting text.
|
You can also create objects from the image background and editable areas. For
information, see Working with objects.
|
All brushstrokes are added to the active object by default. You can also create
an object by clicking the New object button |
| To modify an object in the current rollover state |
1 |
In the Rollover docker, choose one of the following rollover states from the States
list box:
|
• |
Normal
|
• |
Over
|
• |
Down
|
2 |
In the Objects docker, select the object you want to modify.
|
If the Objects docker is not open, click Window |
3 |
Modify the object.
|
The changes apply only to the object in the current state. |
A rollover can display different text in each of the normal, over and down
states. To edit text in a rollover, click the Text tool |
For more information about changing objects, see Working with objects and
Modifying objects.
|
You can also paint text or change the color, fill, and formatting. For more
information about modifying text, see Creating and formatting text.
|
| To remove an object from the current rollover state |
1 |
In the Rollover docker, choose one of the following rollover states from the States
list box:
|
• |
Normal
|
• |
Over
|
• |
Down
|
2 |
In the Objects docker, select the object you want to remove.
|
3 |
Double-click the Eraser tool |
The object is removed only from the current state. |
If you delete an object using the Delete key, the object is deleted from all
rollover states.
|
|
|
Copyright 2010 Corel Corporation. All rights reserved.