Quick links to procedures on this page:
• |
• |
An image map is a single graphic with clickable areas, or hotspots, that link to Web pages. A hotspot is defined using co-ordinates on an image, and an URL is assigned to each defined area.
If you want to add rollovers to an image, or to assign different file formats or compression rates to parts of an image, you can slice it instead of creating an image map. For information about creating sliced images, see Slicing images.
Hotspots are created from objects. You can assign an URL and alternative text to an object. You must also specify the shape for a hotspot; it can be a polygon that closely follows an object’s shape, a rectangle that matches an object’s highlighting box, or a circle that encloses an object.
If you want to create an image map using a photo, you can define an editable area where you want a hotspot to be, and then convert the editable area into an object.
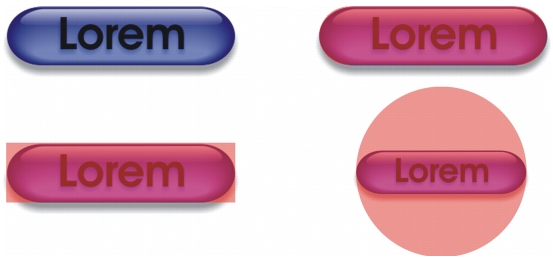
The hotspot on the left button is rectangular, while the hotspot on the right button is circular. Clicking anywhere on the hotspot activates it.
When you export an image map, you must choose one of three different map types: client-side, server-side, or client/server-side. The client-side image map type is most common and is the default setting. The following files are generated automatically, depending on the image map type you choose:
• |
an HTML page for client/server-side, client/server-side, and client-side image map
types.
|
• |
a separate map file containing the hotspot coordinates for client/server-side and
server-side image map types. Client-side image maps do not require a separate map
file because they contain the HTML map tags in the HTML page.
|
| To create a clickable area for an image map |
1 |
In the Objects docker, right-click an object’s thumbnail, and select Properties.
|
If the Objects docker is not open, click Window |
2 |
In the Object properties dialog box, click the WWW URL tab.
|
3 |
Set the following properties for the object:
|
• |
• |
Comment — specifies the alternate text that displays in a browser when you
point to an object
|
• |
Define area as — specifies the shape for the object’s hotspot area
|
4 |
Click OK.
|
| To export an image map |
1 |
From the Export for Web dialog box, choose preset settings from the Preset list
box in the upper-right corner of the dialog box.
|
2 |
In the HTML and slices area, choose Image map from the Export list box.
|
If you want to display the image map in a browser, enable the Display in browser check box. |
3 |
Click Save as.
|
4 |
Choose the drive and folder where you want to store the file.
|
5 |
Type a name in the File name box.
|
6 |
Click Save.
|
Objects will merge with the background when you export the image map.
|
You can also define hotspot areas for an image map using the Internet toolbar.
Click Web |
|
|
Copyright 2010 Corel Corporation. All rights reserved.