Quick links to procedures on this page:
• |
• |
| Premium feature |
The new Unsharp mask lens lets you sharpen your photos by increasing the contrast of adjacent pixels. It preserves both high-frequency details, such as edges, and low-frequency details, such as large structures, gradients, and background colors. For more information about sharpening images, see Sharpening images.
You can create an Unsharp mask lens to cover the entire image, or you can create a lens from an editable area. For more information about editable areas, see Working with masks.
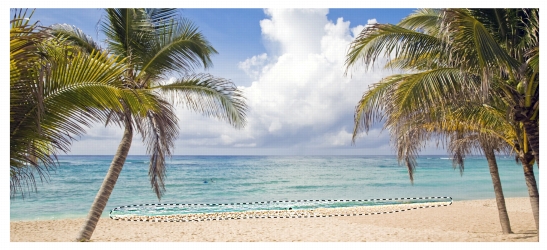
Example of an Unsharp mask lens
After you create a lens, you can edit it. For example, you can add areas to it or remove areas from it, and you can change the lens properties or the lens transparency. For more information, see Working with lenses.
| To create an Unsharp Mask lens |
1. |
Click Object |
2. |
Choose Unsharp mask from the Lens type list.
|
3. |
Type a name in the Lens name box.
|
4. |
Click OK.
|
5. |
In the Unsharp mask dialog box, specify the lens properties.
|
You can also create a lens by clicking the New lens button |
| To create an Unsharp Mask lens from an editable area |
1. |
Define an editable area.
|
2. |
Click Object |
3. |
Enable the Create lens from mask check box.
|
4. |
Choose Unsharp mask from the Lens type list.
|
5. |
Type a name in the Lens name box.
|
6. |
Click OK.
|
7. |
In the Unsharp mask dialog box, specify the lens properties.
|
You can also create a lens from an editable area by clicking the New lens
button |
|
|
Copyright 2012 Corel Corporation. All rights reserved.