Dab Stencil controls
Dab Stencil masks brush dabs before you apply a brushstroke, letting you add control and creative touch to a wide range of brushes — from blending brushes, to Watercolor and Impasto. Applying a dab stencil knocks out areas of the brush dab by making them more transparent. It is as if the brush dab becomes a stamp that has elevated and indented areas. The brush applies more paint with the elevated areas of the dab, and less or no paint at all with the indented areas.
You can choose a dab stencil source from a variety of stencil media such as paper, flow maps, and textures.
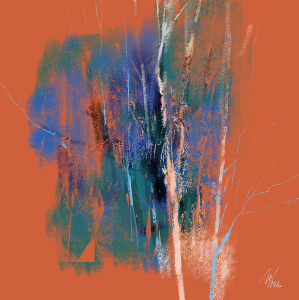
The brushstrokes in this artwork use the Dab Stencil feature. Artwork by Melissa Gallo.
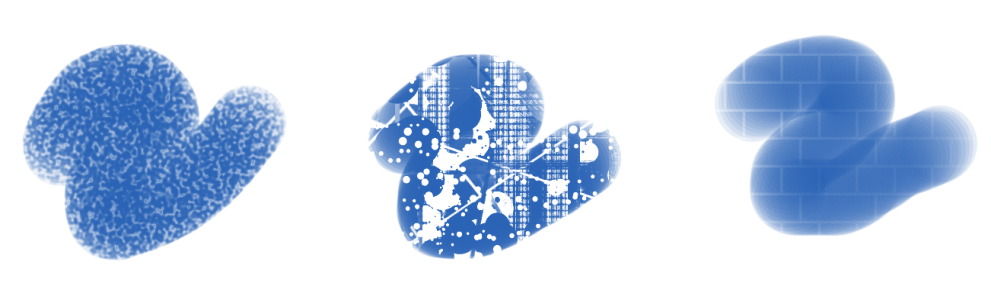
From left to right: Using paper, flow map, and texture as a dab stencil source
You can adjust the properties of the dab stencil to change the look of the brushstrokes. For example, you can use the Strength and Min Strength controls to adjust the maximum and minimum opacity of the dab stencil. When the dab stencil is at maximum strength (100%), it is the most opaque and makes the dab areas that it covers the most transparent. In addition, you can apply jitter to vary the opacity of the dab stencil, and you can smooth the jitter for more natural-looking brushstrokes. You can link a dab stencil to an expression so that dab stencil opacity changes in response to specific mouse or stylus movement, such as pressure, direction or velocity.

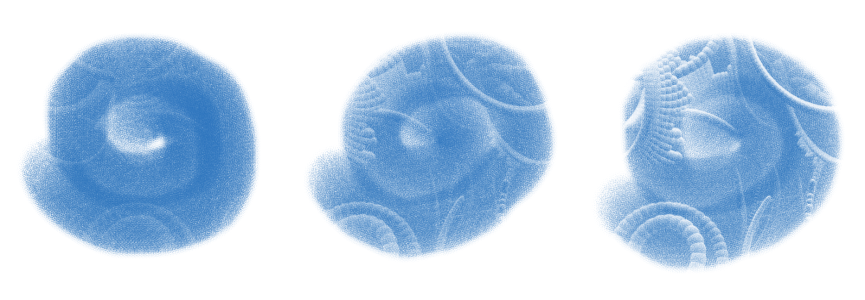
Strength settings from left to right: Maximum, medium, and low values. At maximum strength, the dab areas knocked out by the stencil stand out best; at low strength, the knocked out areas almost blend with the other areas.
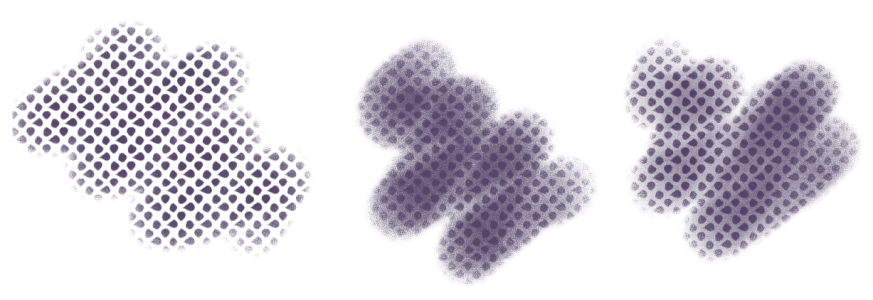
The strength of the dab stencil is at 100% in all three brushstrokes, but the minimum strength varies from 0 to 87%. Higher minimum settings result in a dab stencil with higher minimum opacity that produces a more distinct brush stamp (right).
From left to right: Dab stencil brushstrokes without jitter, with jitter, and with jitter and smoothness
You can also link a dab stencil to audio input from your microphone, or internal audio such as streaming music. The opacity (strength) of the dab stencil varies in synch with the changes of the audio signal.
The Dab Stencil feature differs from grain in several ways. Dab stencils vary the opacity of the dab before you apply a brushstroke and can be applied only to stamp-based brushes. While grain works only with paper textures, dab stencils can use flow maps and other textures as well. Also, dab stencils work with methods and subcategories that currently do not support grain. For example, you can apply a dab stencil to a glow brush.

Applying the same paper texture by using Grain (left) and applying a dab stencil (right)
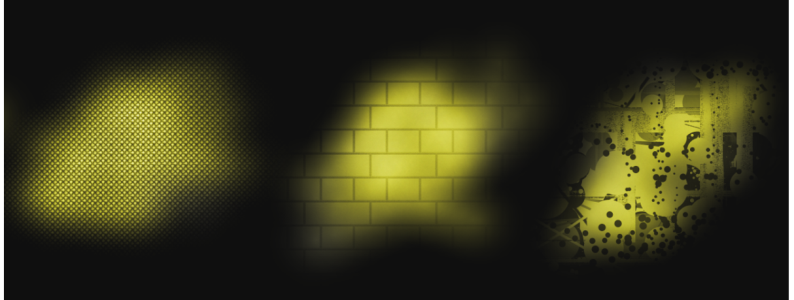
Glow brushes work well with the Dab Stencil feature to create interesting texture and lighting effects. From left to right: A paper, texture, and a flow map are used as dab stencil sources.
You can use the Dab Stencil feature together with texture brushes to create impactful and controlled brushstrokes. For more information about texture brushes, see Texture painting.
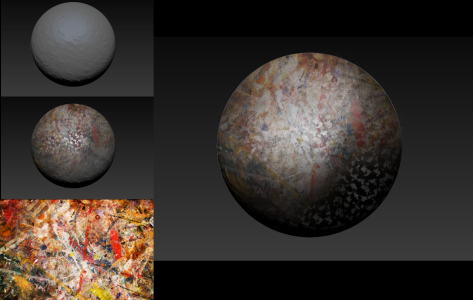
Texture brushes and dab stencil brushes are used together with the shown texture and other paper textures to create the sphere surface on the right.
Dab Stencil can also be combined with Impasto brushes to add a realistic, three-dimensional look and feel to an image.
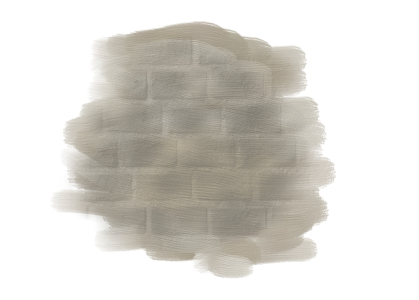
Combining Impasto with Dab Stencil
For a list of sample Dab Stencil brushstrokes, see Dab Stencils.
To apply a dab stencil to a brush variant
You can also apply a dab stencil from the Dab Stencil panel (Window ![]() Brush Control Panels
Brush Control Panels ![]() Brush Shape
Brush Shape ![]() Dab Stencil).
Dab Stencil).
To adjust the properties of a dab stencil
|
To choose an audio input and adjust audio settings, choose Window
|
|