Glazing controls
There are multiple ways to control the opacity of the paint deposited with a brush. Glazing (Window ![]() Brush Control Panels
Brush Control Panels ![]() Brush Media
Brush Media ![]() Glazing) lets you specify the maximum level of opacity in a brushstroke.
Glazing) lets you specify the maximum level of opacity in a brushstroke.
Glazing allows you to work with very high levels of transparency and paint with light, semi-transparent brushstrokes.
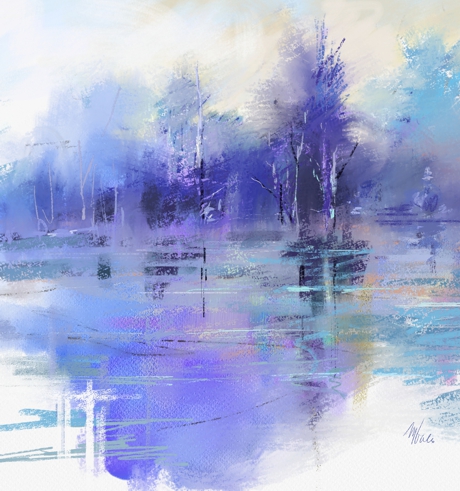
Glazing brushes were used in this painting by Melissa Gallo.
Glazing is different from Brush opacity (Window ![]() Brush Control Panels
Brush Control Panels ![]() Brush Media
Brush Media ![]() Opacity), which controls the opacity of each dab (or bristle for other brush types.) If you set Glazing to 20%, the opacity in a single brushstroke will never exceed 20%. Within that 20% range, you can specify the opacity of each dab from 1% to 100%. For example, if you set dab opacity to 100%, the paint that a brushstroke will deposit will still be only 20% of the selected color. Brush opacity allows you to gradually build up to the selected color and Glazing determines what that color is. The lower the Brush opacity, the slower you build up to the color specified by Glazing in a single brushstroke.
Opacity), which controls the opacity of each dab (or bristle for other brush types.) If you set Glazing to 20%, the opacity in a single brushstroke will never exceed 20%. Within that 20% range, you can specify the opacity of each dab from 1% to 100%. For example, if you set dab opacity to 100%, the paint that a brushstroke will deposit will still be only 20% of the selected color. Brush opacity allows you to gradually build up to the selected color and Glazing determines what that color is. The lower the Brush opacity, the slower you build up to the color specified by Glazing in a single brushstroke.
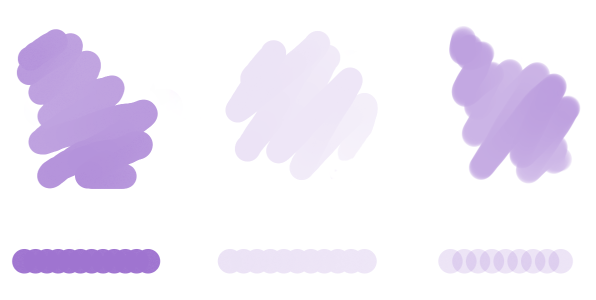
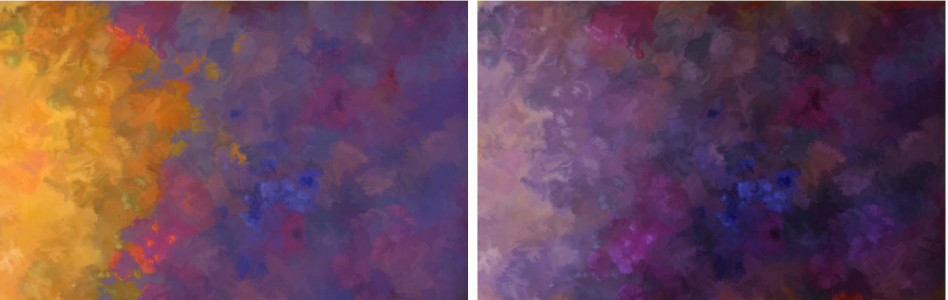
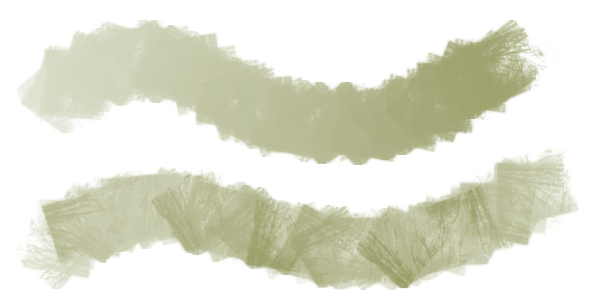
(Left) 100% Brush opacity, 100% Glazing; (middle) 100% Brush opacity, 20% Glazing. Color does not build up when you brush over the same area in a single brushstroke; (right) 20% Brush opacity, 100% Glazing. Color builds up when you brush over the same area in a single brushstroke.
Glazing brushes can help you fill an area with long continuous strokes that have a very soft gradation from the beginning of the mark to the end.
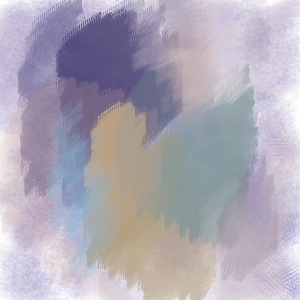
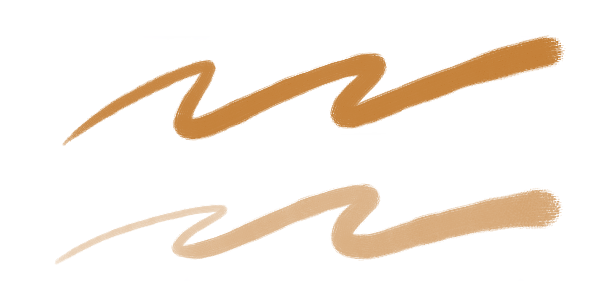
Glazing brushes create a nice smooth blend between colors; there are no artifacts in the areas where the dabs overlap.
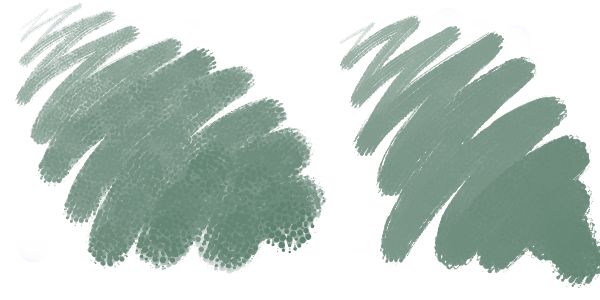
You can add grain to Glazing brushes, however, you will see overlaps.
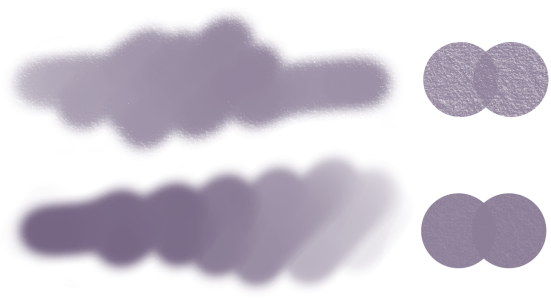
A single brushstroke with 100% Glazing and (top) 100% Grain, (bottom) 50% Grain
Glazing is available to all stamp-based brushes and can be linked to specific stylus or mouse movements. For more information, see Expression settings.
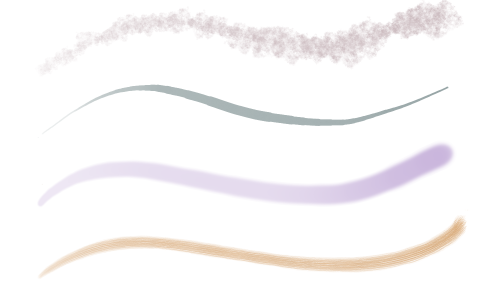
Glazing works well with the following dab types: (from top to bottom) Captured, Circular, Computed Circular, Static Bristle
You can use merge modes to control how brushstrokes interact with the underlying colors on the active layer or the canvas.
For a list of sample Glazing brushstrokes, see Glazing brushes.
To adjust Glazing properties
Glazing brushes work only with the Glazing stroke type. For more information, see General controls: Stroke types. The controls on the Glazing panel are grayed out when you select a stroke type that is not supported, such as Single, Multi, Rake, and Hose.
If there are unwanted overlaps in your Glazing brush, try the following: