
Quick links to procedures on this page:
• |
• |
• |
• |
• |
• |
• |
• |
Corel Painter lets you adjust selections in various ways. You can invert a selection, which deselects the previously selected area and selects the previously unselected area. You can also change the look of the edges of a selection by feathering, anti-aliasing, stroking, or changing the borders. In addition, you can adjust the size of selections by expanding and contracting the pixels. You can also add or subtract areas of the selection.
Inverting a selection switches the selected and unselected areas. For example, in an image of a boat on water, if you've created a precise selection of the boat, you can select everything but the boat by inverting the selection.
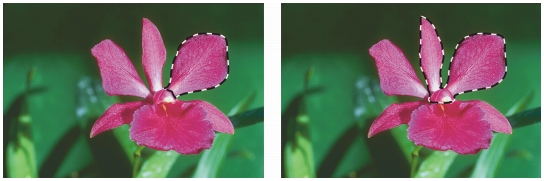
The flower is selected (left). After inverting the selection, everything but the flower is selected (right).
A pixel-based selection can have 256 values in it, like a grayscale image. An inverted pixel-based selection is equivalent to the negative of a grayscale image. For example, a pixel that has 80% luminance will have 20% luminance when inverted.
| To invert a selection |
1 |
In the toolbox, click the Selection Adjuster tool |
2 |
From the menu bar, choose Select |
For a unique effect, you can nudge the selection by a few pixels and choose the
command again. To nudge the selection, use the Selection Adjuster tool to
click the selection, and then press an arrow key on your keyboard a few times.
This technique works only when the selection is directly on the canvas, it does
not work if the selection is on a layer.
|
You can soften the edges of a path-based selection by anti-aliasing or feathering. Anti-aliasing smooths the edges of a selection by modifying the color transition between the pixels. Feathering, on the other hand, softens the edges by gradually increasing the transparency of the pixels along the edge of the selection.
| To apply anti-aliasing to a selection |
1 |
Create a selection by using one of the selection tools.
|
2 |
On the property bar, click the Anti-Alias button |
| To feather the edge of a selection |
1 |
In the toolbox, click the Selection Adjuster tool |
2 |
From the menu bar, choose Select |
3 |
In the Feather Selection dialog box, specify the number of pixels that you want to
feather.
|
The Select menu has several options for modifying the borders of path-based selections. You can increase the border width. You can smooth a selection by removing sharp edges, rounding corners, and straightening the outline path.
| To modify the border of a selection |
1 |
In the toolbox, click the Selection Adjuster tool |
2 |
From the menu bar, choose Select |
3 |
In the Border Selection dialog box, specify the number of pixels for the width of the
border.
|
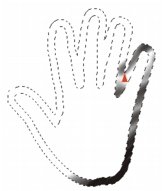
Border selection with airbrush strokes applied.
| To smooth a selection |
1 |
In the toolbox, click the Selection Adjuster tool |
2 |
From the menu bar, choose Select |
3 |
Repeat the command from the previous step until the path is sufficiently smooth.
|
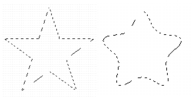
Selection before (left) and after (right) smoothing.
You can expand or contract a selection by a set number of pixels. When you expand a selection, it is expanded on all sides by the specified number of pixels. When you contract a selection, it shrinks on all sides by the specified number of pixels.
| To expand or contract a selection |
You can adjust the size and shape of a selection by adding or subtracting selection areas.
| To add to a selection |
1 |
Create a selection by using one of the selection tools.
|
2 |
On the property bar, click the Add to Selection button |
3 |
Select the area that you want to add.
|
If you are using the Oval Selection tool |
You can also add to a selection by holding down Shift and selecting the area
that you want to add. If you are using the Oval Selection tool or the
Rectangular Selection tool and you want to select a circular or square area,
you need to release Shift for a moment and then hold down Shift again while
dragging.
|
When making selections, you can use any combination of selection tools,
including the Magic Wand tool |
Adding to a path-based selection.
| To subtract from a selection |
1 |
Create a selection by using one of the selection tools.
|
2 |
On the property bar, click the Subtract from Selection button |
3 |
Select the area that you want to subtract.
|
If you are using the Oval Selection tool |
You can also subtract from a selection by holding down Option (Mac OS) or
Alt (Windows) and selecting the area you want to subtract. If you are using
the Oval Selection tool or the Rectangular Selection tool and you want to
select a circular or square area, you need to hold down Option + Shift (Mac
OS) or Alt + Shift (Windows) while dragging.
|
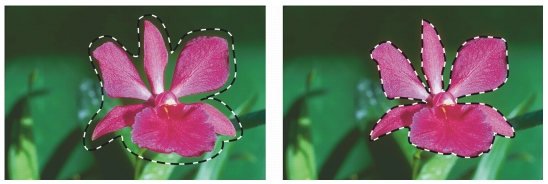
Subtracting from a path-based selection.
| Some features described in the Help are available only in Corel Painter 12, and are not included in Painter Lite. Visit www.corel.com/painter for more information about Corel Painter 12. |
Copyright 2012 Corel Corporation. All rights reserved.