Getting started with layers
A layer is an object that serves as a container for image data. You can use layers to build an image one element at a time. This allows you to modify and manipulate the content of a layer independently of other layers and the canvas. Likewise, you can work on the canvas without interfering with any of the other layers. For example, if you introduced an element to an image by using a layer and you don’t like the result, you don’t have to clear the entire canvas — just modify or remove the affected layer.
When you add content, such as brushstrokes to a layer, the areas of the layer that have no content are transparent. This allows you to see the content of layers below and the canvas. In Corel Painter, you can control the behavior of layer transparency. For more information, see Preserving layer transparency.
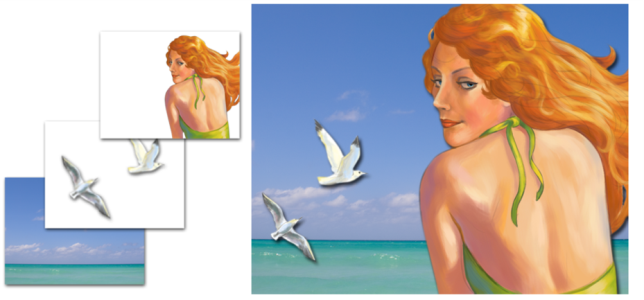
Think of layers as sheets of clear material, such as acetate. Painting on a layer obscures the image below it. Areas of a layer that don’t contain images remain transparent.
Understanding layers and the canvas
To better understand the role of layers in Corel Painter, it’s important to understand the role of the canvas. All Painter documents have canvas — a blank background that is filled with white pigment by default. You can change the canvas color, and brushes that blend and mix paint will interact with the canvas color. For more information about picking up color from underlying layers, see Painting on layers.
Although the canvas displays as the first layer in the Layers panel, you cannot modify the canvas like other layers. For example, you cannot delete, reorder, transform, or group the canvas. In addition, the canvas cannot be transparent, so if you convert the canvas to a layer, even areas that appear transparent retain the canvas color. For more information about converting the canvas to a layer, see Converting selections into layers or floating objects.
For greater control and more options, such as changing layer order, location, and transparency, consider painting only on layers. When you start a new document, Corel Painter automatically creates a Default layer, or you can choose to create a Thick Paint, Watercolor, or Liquid Ink layer instead. You can also choose to hide the canvas while you paint. For more information, see To create a new document.
Corel Painter includes different layer types that are pixel-based, media-based or vector-based. It also includes dynamic and reference layers. In addition, there are several special layers, including Thick Paint, Watercolor, and Liquid Ink.
The Corel Painter default layer is pixel-based. It is the most compatible layer type, and is recommended if you are round-tripping files with Photoshop. You can use most brush variants on pixel-based layers, with the following exceptions: Thick Paint, Liquid Ink, Real Watercolor, and Watercolor. You can transform, pick up underlying color, preserve layer transparency, merge, collapse, reorder, lock, unlock, group, and delete default layers. The default layer is also used in some specialized functions, such as building an image hose nozzle, embedding a URL in an image, or creating an animation.
With Thick Paint layers, you can use Thick Paint and other compatible brushes to create brushstrokes with pigment and depth. The paint on Thick Paint layers can be pushed, pulled, and mixed to increase or decrease the elevation of brushstrokes. For some brushes, such as Impasto, the control of depth provided by Thick Paint layers produces more realistic results.
You can also apply and adjust surface lighting to change the appearance of thick paint with depth of shadows. By default, the application warns you every time you choose a brush that is incompatible with Thick Paint layers. You can set Corel Painter to automatically create a new compatible layer for you and save this option in the application preferences, so that you no longer see this warning. For more information, see Adjusting Thick Paint layers.
With Watercolor layers, you can apply pigment and colors that flow and mix and absorb into the paper. Watercolor brushes also interact with the texture and grain of the paper. The entire layer can be wet or dry, and watercolor brushstrokes will automatically rewet. You can also convert default layers to watercolor, as well as merge two or more watercolor layers. For more information, see Working with the Watercolor layer.
With Liquid Ink layers, you control the appearance of depth and adjust the threshold of the edges of the ink. You can also control surface lighting, remove and smooth edges, and adjust the width, height, or three-dimensional appearance of brushstrokes. For more information, see Liquid Ink.
Vector-based layers contain shapes or text. When you create a shape with one of the shape tools (Pen, Quick Curve, Rectangular Shape, or Oval Shape) or text using the Text tool, Corel Painter automatically adds a new layer to the document. Each new shape or text block becomes a separate layer; you can group multiple shapes together or merge them into a single shape.
The following table describes each of the layer types.
|
Stores the paint applied by Thick Paint brushes. You can adjust the elevation of Thick Paint brushstrokes on the layer. For more information, see Adjusting Thick Paint layers.
|
|
|
Stores the paint applied with the Watercolor and Real Watercolor brushes and enables them to mix and flow together. When you apply a Watercolor brush to the canvas, or to a standard layer, an incompatible brush warning appears and lets you set a default behavior. For more information about incompatible brush warnings, see Special layers preferences. For more information, see Working with the Watercolor layer.
|
|
|
Stores the brushstrokes of Liquid Ink brushes. When you apply one of the Liquid Ink brushes to the canvas or to an image layer, an incompatible brush warning appears and lets you set a default behavior. For more information about incompatible brush warnings, see Special layers preferences. For more information about Liquid Ink brushes, see Working with Liquid ink brushes.
|
|
|
Stores layer selections so you can edit layer content. For more information, see Converting selections into layers or floating objects.
|
|
|
Stores low-resolution representations of other layers, which lets you manipulate standard layers more easily. For more information, see Working with reference layers.
|
|
|
Lets you apply effects to the underlying image. Some dynamic layers, such as Glass Distortion and Equalize, interact with the underlying images in a specific area to produce effects. Other dynamic layers, such as Liquid Metal, interact with the underlying images as you apply brushstrokes. For more information, see Dynamic Plug-ins.
|
|
|
Stores any shapes that you create using one of the shape tools. When you create a shape, a new vector-based shape layer is automatically created. For more information, see Getting started with shapes.
|
|
|
Stores single blocks of text that were inserted with the Text tool. When you add text, a vector-based text layer is automatically created. For more information, see Aligning text.
|
Some features in Corel Painter can be applied only to default, pixel-based layers. If you want to use these features on shapes, Watercolor layers, Liquid Ink layers, dynamic layers, and so on, you must convert them to default layers.
To convert to a default layer
You can also convert a layer to a default layer by right-clicking the layer, and choosing Convert To Default Layer.