Quick links to procedures on this page:
• |
• |
• |
• |
• |
To create an impasto effect, you need to choose the Impasto brush category and an Impasto brush variant. Impasto brushstrokes appear textured and three-dimensional. You can alter the appearance of impasto brushstrokes by using depth and lighting controls.
In Corel Painter, you can transform most brush variants into custom impasto brushes from the Brush Controls palette.
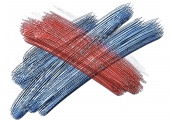
With Impasto, you can create wonderfully textured paintings.
When you use an Impasto brush, you accumulate depth information as you paint. However, you need to display the impasto information to view it.
The Canvas layer holds the depth information for the entire image, including any additional layers. When you display the impasto information, it also shows how the Impasto Lighting affects your strokes.
| To activate or deactivate the Impasto view |
1 |
Choose Window |
2 |
In the Navigator panel, click the Open Navigator Settings button |
If you want to deactivate the Impasto view, click the Open Navigator Settings button |
You can also activate the Impasto view by choosing Canvas |
| To clear the Impasto information |
• |
Choose Canvas |
You can apply a variety of Impasto brushstrokes by using an Impasto brush variant. These brushes simulate different types of depth effects achieved with traditional art media, such as thick oil paint. You control the Impasto effect by changing the paint thickness, or depth. For more information, see Impasto Controls.
You can control the appearance of depth by using the Amount, Picture, Shine, and Reflection settings in the Surface Lighting dialog box. At any time, you can change these settings to produce different texture effects:
• |
The Amount setting affects the thickness of the Impasto. It does not affect
individual brushstrokes, nor does it affect other Impasto strokes.
|
You can control the appearance of depth in Impasto by adjusting the Amount slider.
• |
The Picture setting controls how much color appears in the image. At its lowest
value, all color is washed out, leaving only the highlights.
|
• |
The Shine setting controls how much highlight appears on the surface of strokes.
Higher Shine values make the stroke look metallic.
|
• |
The Reflection setting maps a clone source image or pattern onto the texture at a
variable percentage. For more information, see Working with Reflection Maps.
|
Adjustments affect all Impasto brushstrokes. To change the depth of individual brushstrokes, you can vary stylus settings or build up media. Refer to Controlling the Depth Interaction of a Medium for more information.
You can also set how light sources shine on the Impasto brushstrokes, add or delete lights, and change light color and position. Refer to Adjusting Surface Lighting for more information.
If you want to create your own custom brush variants, use the Brush Controls palette to adjust brush properties. Refer to Creating Custom Impasto Brushes for more information.
| To create an Impasto effect |
1 |
Choose Window |
2 |
In the Navigator panel, click the Open Navigator Settings button |
3 |
Click the Brush Selector on the Brush Selector bar.
|
4 |
In the Brush Library panel, click the Impasto brush category, and click an Impasto
brush variant.
|
5 |
Choose Canvas |
6 |
In the Surface Lighting dialog box, use the sliders to set attributes for
Appearance of Depth and Light Controls.
|
7 |
Paint on the canvas or layer.
|
You can change most brush variants into Impasto brushes by using the Impasto brush settings in the Brush Controls palette. The controls let you set drawing and depth methods, the amount of depth applied, and the brush interaction. The Impasto settings act identically to other brush settings, in that they can be saved as part of a brush variant or applied to any active brush. For more information on creating new brush variants, see Adjusting Brushes.
All of the drawing methods affect the next strokes you make in the document.
Impasto has three drawing methods:
• |
The Draw to Color method applies color. You can set the color in the Color panel.
|
• |
The Draw to Depth method applies depth to the image.
|
• |
The Draw to Depth and Color method applies both color and depth to the image.
|
The Depth Method lets you choose a control medium for applying depth. Corel Painter uses the luminance (brightness) information in the control medium to determine how much depth is applied within a stroke. Light areas of the medium receive more depth; dark areas receive less. Black areas appear flat.
For example, when you use Paper as the Depth Method, the bright and dark areas of the paper grain determine where grooves and bumps appear in the stroke.

This Impasto stroke is produced when Paper is used as the Depth Method.
You can choose from five depth methods:
• |
The Uniform method applies depth evenly. Strokes have little texture.
|
• |
The Erase method levels the depth layer. If you’ve created texture strokes that you
don’t like, you can use this setting to remove them.
|
Erase applies only to depth, not to color. With the Depth and Color drawing method, the Erase method removes depth while applying color. |
The amount of depth removed depends on the value of the Depth slider. If you want to remove the entire Impasto stroke, set Depth to 0. |
• |
The Paper method uses the current paper method to control depth. You can choose
different papers and change their scale by using the Paper Selector in the toolbox.
For more information, see Inverting and Scaling Paper Grain.
|
• |
Original Luminance uses a clone source’s luminance to control depth. Refer to
Using Clone Source Luminance to Create Texture for more information.
|
• |
Weaving Luminance controls depth using the current Weave. You can choose
different weaves by using the Weaves Selector in the toolbox.
|
You can invert the depth method by using the Invert option. When a method is inverted, the negative of the source is used in the stroke. For example, using the Invert option with Weave luminance switches the luminance values of the current weave so that light areas of the weave become dark and vice versa. This change results in an inverted texture within the Impasto brushstrokes.
When you use a depth method, you paint with a new medium that has texture and builds up depth as you layer brushstrokes.
The Impasto sliders let you set how much depth is applied with a stroke, the amount of texture applied within a stroke, and how each stroke interacts with other Impasto brushstrokes.
• |
The Depth slider controls the depth of individual strokes. Higher values produce
strokes that have deeper grooves.
|
• |
The Smoothing slider controls the transition of the texture applied to a stroke.
|
• |
The Plow slider controls how much a stroke interacts with other Impasto
brushstrokes.
|
When a stroke with a high Plow value encounters another Impasto stroke, it displaces the depth of the existing stroke. In essence, your brushstroke “plows” through existing strokes. |
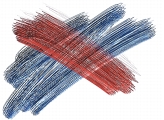
By adjusting the Plow slider, you can produce incredibly realistic effects. |
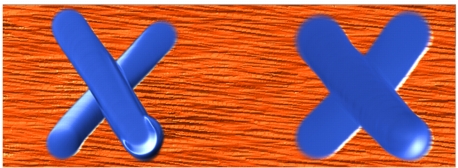
The effects of high (left) and low (right) Plow settings.
• |
The Negative Depth option changes the direction of depth. When Negative Depth
is enabled, the brush digs valleys instead of raising ridges.
|
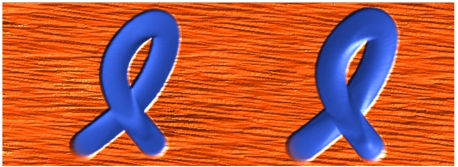
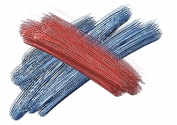
Normally, Impasto raises ridges and bumps. The Negative Depth option forces Impasto to excavate instead.
| To create an Impasto brush variant |
1 |
Choose the Brush tool |
2 |
Choose Window |
3 |
Choose a drawing method from the Draw To list box.
|
4 |
Choose an application method from the Depth Method list box.
|
5 |
Adjust the Depth slider to set how much depth the brush applies.
|
6 |
Adjust the Smoothing slider to set the transitions in the texture.
|
Higher Smoothing values produce less textured strokes. |
7 |
Adjust the Plow slider to control how much a depth stroke displaces other strokes
that it intersects.
|
You can create Impasto brush variants using only dab-based dab types, such
as Circular, Static Bristle, and Computed Circular.
|
In addition to the Impasto controls, you can also use the Depth slider in the Brush Controls palette (Impasto panel) to add more complexity to your strokes. The Depth slider can alter the flow of depth as you paint. By using one of the nine input controllers, you can control the flow of depth based on pressure, velocity, or bearing. For more information, see Impasto Controls.
| To use the Depth brush feature |
1 |
Choose the Brush tool |
2 |
Choose Window |
3 |
Choose Depth from the Draw To list box.
|
4 |
Choose a depth method from the Depth Method list box.
|
5 |
Adjust the Depth slider, and choose an expression from the Expression list box.
|
For a realistic effect, try varying Depth inversely with Pressure. Set the
Expression list box to Pressure, and enable the Invert option. This lets you
apply paint more thickly when you press lightly, but more thinly when you
press firmly, just as if you were using real paint.
|
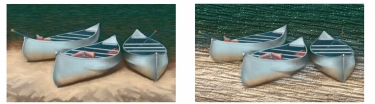
You can control how Corel Painter blends Impasto brushstrokes with images on other layers by selecting a composite depth method in the Layers panel.
The Composite Depth menu provides the following methods for combining Impasto brushstrokes:
• |
The Add method, which is the default composite depth method, combines depth
information between layers. Brushstrokes on different layers build up where they
overlap. If the composite depth method is set to Add and you paint with an
Impasto brush variant on a layer, the composite depth setting does not change.
|
An example of the Add composite depth method.
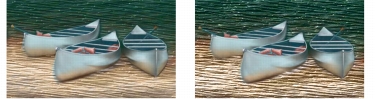
• |
The Subtract method removes depth information between layers. Impasto
brushstrokes on top layers create grooves in the image data beneath them. If the
composite depth method is set to Subtract and you paint with an Impasto brush
variant on a layer, the composite depth method does not change.
|
An example of the Subtract composite depth method.
• |
The Replace method uses layer masks to replace the depth information from lower
layers with information from top layers. Wherever strokes overlap, only the top
strokes are visible; the lower strokes are completely covered. If the composite depth
method is set to Replace and you paint with an Impasto brush variant on a layer,
the composite depth method does not change.
|
An example of the Replace composite depth method.
• |
The Ignore method prevents impasto brushstrokes from interacting with image
data on different layers. With the Ignore method active, the display of depth for
the layer is turned off, even when the View Depth icon on the document window is
active. This makes it possible to disable display of depth for individual layers. If the
composite depth method is set to Ignore and you paint with an Impasto brush
variant on a layer, the method changes back to Add.
|
You can set a different composite depth method for every layer in a document. Refer to Blending Layers by Using Composite Methods for more information.
|
|
Copyright 2012 Corel Corporation. All rights reserved.