Quick links to procedures on this page:
• |
The Image Hose can be controlled by changing the Image Hose brush and the nozzle file.
You can change the opacity, size, and spacing of nozzle images and determine the placement of images in the stroke. In addition, brush expression settings let you use different stylus attributes, such as pressure, tilt, and bearing to change the size and angle of images on the fly.
You can index a nozzle file to control the order in which nozzle images are delivered. For more information, see The Rank Indexing System. You can also create your own nozzle files to determine the image content and ranking. For more information, see Designing Nozzles: 1, 2, or 3 Ranks.
You can use the property bar to adjust the opacity of nozzle images or to mix them with an additional color. The Opacity slider allows you to make nozzle images semitransparent.
If you move the slider all the way to the left, the images become invisible.
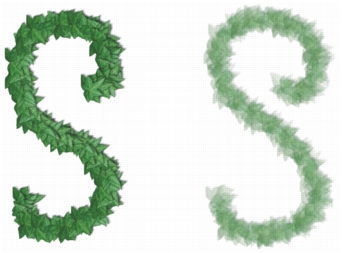
You can change the opacity of Image Hose strokes. Settings shown are 100% opacity (left) and 20% opacity (right).
The Grain slider allows you to mix the additional color with the nozzle images. If the slider is set to 100%, the nozzle images remain pure. As you move the slider to the left, more of the additional color appears in the images. If the slider is set to 90%, Corel Painter mixes 10% of the additional color to 90% of the image. This is a handy way to adjust the shading of image elements. For information on selecting an additional color, refer to Using the Color Panel.
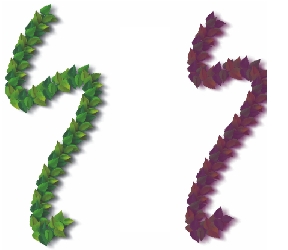
You can turn down the Grain to mix in the additional color. Settings shown are 100% grain (left) and 39% grain (right).
For more information about opacity and grain, see Setting Basic Brush Attributes.
The Set Nozzle Scale command in the Nozzle Selector menu lets you control the size of image elements delivered by the Image Hose. At 100%, the images are the same size as they are in the nozzle file.
| To adjust the scale |
1 |
Choose Window |
2 |
In the Nozzle Libraries panel, click the Nozzle Options button |
3 |
Type a value in the New Scale box.
|
You can also use the Size slider on the property bar to change the size of
images delivered by the Image Hose, just as you would with other brushes.
|
You control the space between images from the Spacing panel in the Brush Controls palette. Moving the Spacing slider to the right increases the spacing between image elements.
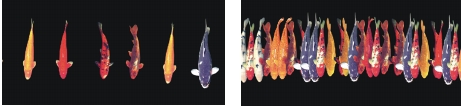
The Spacing slider controls the spacing of the images. Settings shown are 85% (left) and 20% (right).
Because spacing is based on the diameter of the brush, the Size settings also affect image spacing. Increasing the brush size adds space between the images applied with the hose. Size settings affect the size of the image elements themselves. Increasing the brush size adds space between the images applied with the hose.
The Min Size slider also affects the size of images applied by the Image Hose. When set to stylus pressure or direction, the Min Size setting determines the range in which the images you apply will vary in size.
For more information on the Spacing settings, see Spacing Controls. For more information on the Size and Min Size controls, see Size Controls.
You randomize the proximity of images to the stroke path with the Jitter slider on the property bar. When the slider is all the way to the left, images are directly in the stroke. Moving the slider to the right increases the scattering of the images.
You can also adjust the Jitter. For more information, refer to Jitter Controls.
The Expression settings in the Expression panel in the Brush Controls palette offer dynamic control over the brush settings described above. You can use these settings to produce interesting effects. For example, angle settings apply when you use the Image Hose to paint on images. For more information on the Expression settings, refer to Expression Settings.
|
|
Copyright 2012 Corel Corporation. All rights reserved.